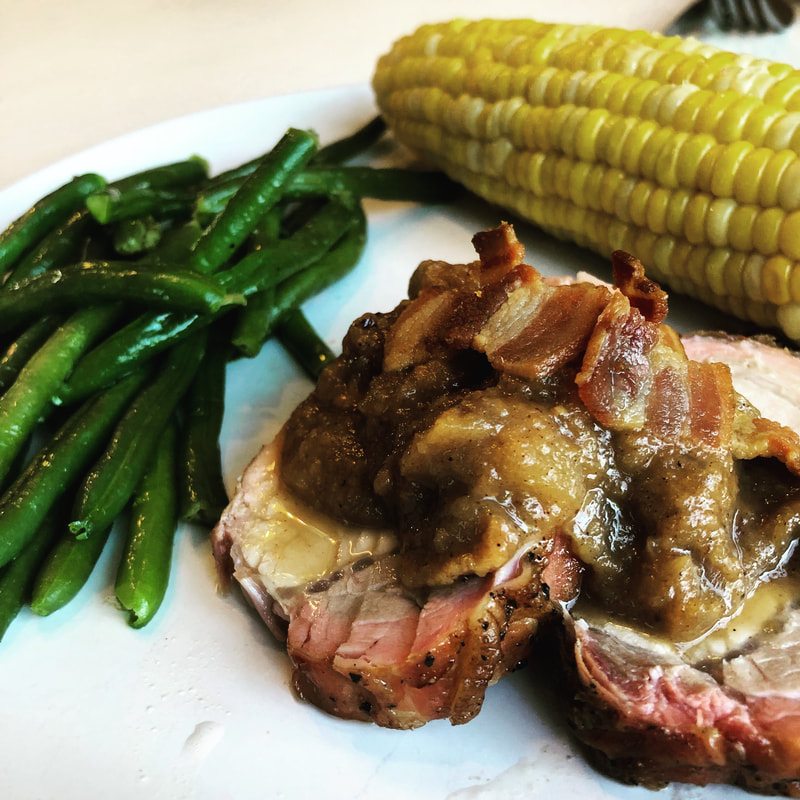
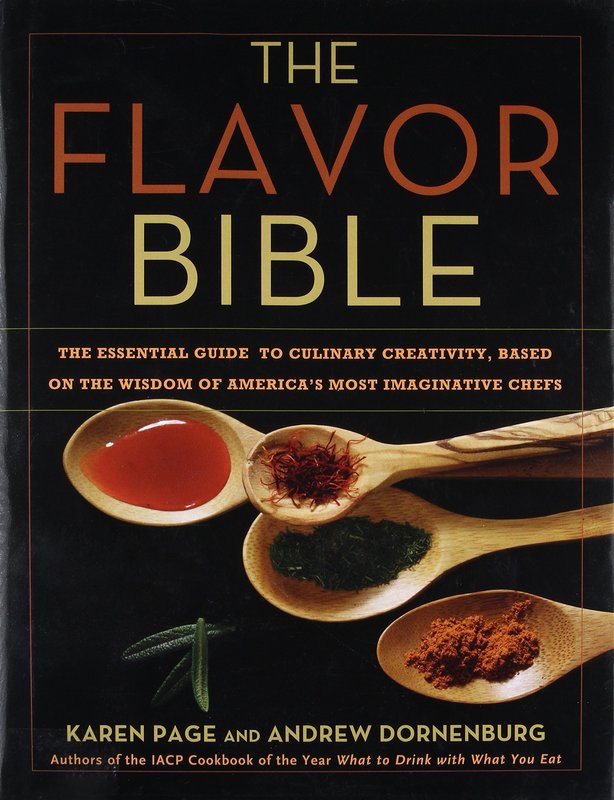
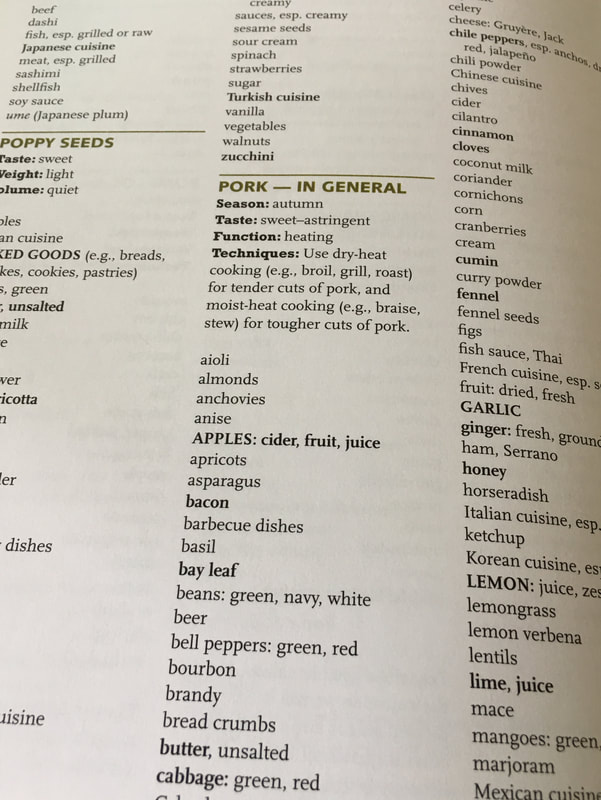
 One of the big things that separates a good meal from a great meal is a sauce! If you like to eat out at nice restaurants like we do, that is something that they all have in common, a fantastic sauce pairing that goes along with the main course. It can provide a balance of flavors, it can tie a dish together, and it can provide a needed level of moisture/fat with a leaner cut of meat. After years of watching cooking shows and a little experimentation myself I've learned some basics in sauce making and how to combine flavors. If you are novice learning some basic skills in this world will certainly help. Here is a link to an article talking about the 5 French Mother Sauces. Might sound a little fancy but most sauces that exist in the world are a spinoff of these base sauces. From this you can play with flavors that pair with your main dish. Another thing I would recommend is a book that I pull out on occasion, The Flavor Bible. This book is fantastic in that it allows you to look up a food, say pork, then it gives you a list of other foods, veggies, and spices that pair well with it. So combine that with the basics of how to make a sauce and you are pretty much set!
The cool thing about The Flavor Bible is that it highlights the ingredients that work best. For this Bacon Apple Butter, I knew we were making pork so take a look at pairings above...
1 Comment
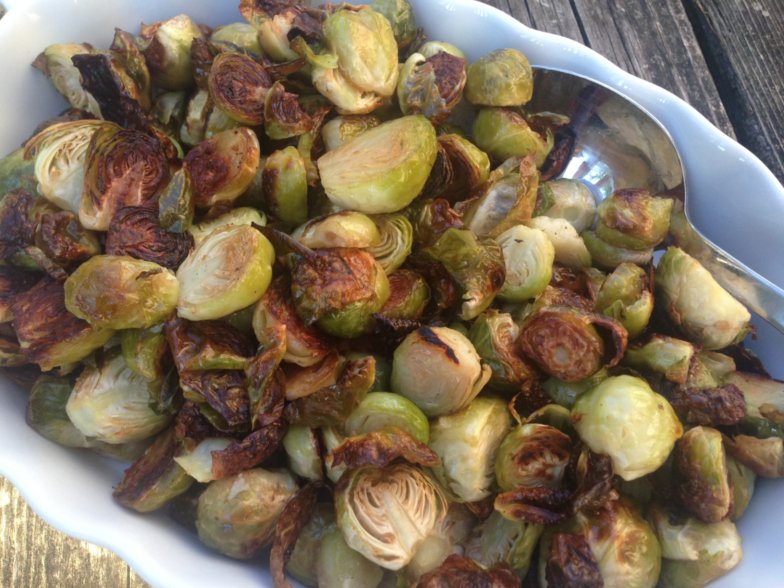 I know some people that begin to drive heave if they are threatened to eat a brussel sprout. A couple are in my immediate family. Growing up my mom on occasion would make them but they were usually either steam or boiled with some butter on them. Although I could probably stomach that now, at the time it was one of the most disgusting flavors. The smell was similar to what a Band-Aid smells like and I could only imagine what they taste like. Had my mom prepared sprouts this way, I'm guessing there would have been a 50/50 chance that I would have actually eaten them. I mean they are still green and green food in our house was immediately met with rejection, unless it was Jello. That stuff was delicious! Just don't ruin it by putting fruit in it! The process of roasting brussels is pretty straightforward. One key is making sure you start with fresh brussels not the frozen version. If you get the frozen ones, they will be more apt to just steam and bring you and I back to that Band-Aid flavor and smell. So start fresh! Then all you need to do is trim a little bit of the chewy stem off of them if there is some. We like to half or quarter ours from there depending on the size. You could roast them whole but they would take a LONG time so that's not advised. Once you halve them, spread them out evenly on a baking sheet. Drizzle with roughly 2 tablespoons of extra virgin olive oil per pound of brussels. Season generously with salt and I like a little pepper also but not always. Once seasoned, put them the oven that was preheated to 425. Depending on the size they should take anywhere from 20-30 minutes and I like to stir them half way through. What you are looking for is for them to start turning slightly brown if not black. In the cooking world that's called carmelization! Do it! They aren't burnt, they are perfect that way. It will bring out some of the natural sugars that are in a plant that is inherently bitter and if prepared poorly can taste like Band-Aids! Try it this, I bet you will like brussels for the first time! Or at worst you won't hate them. Want to take this next week off from planning your own Healthy Meals? Let us do the work for you! Follow the link below and we will give you are 5 Day Meal Guide for free!
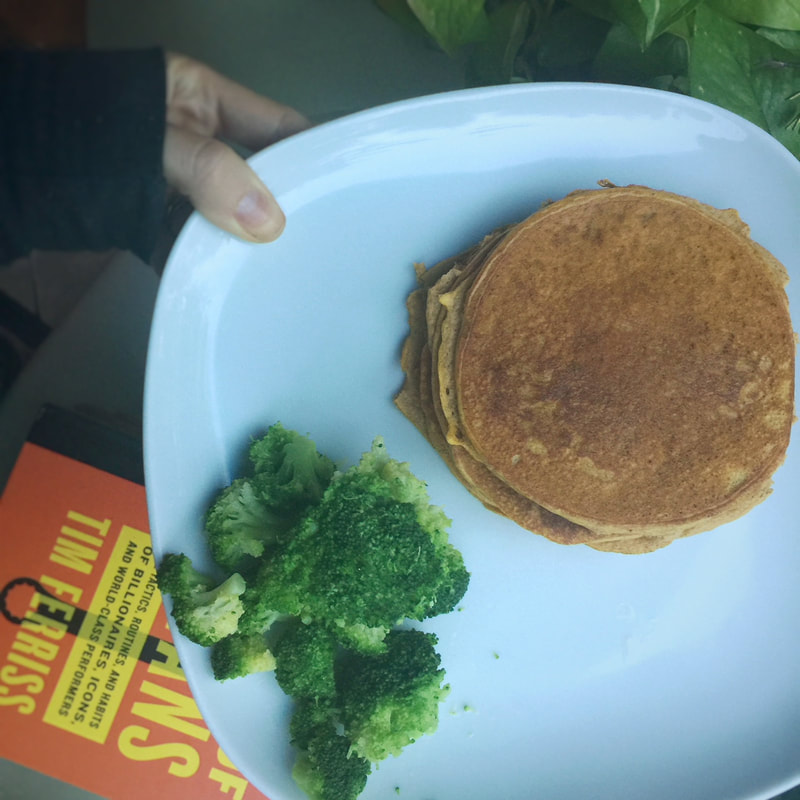 It wouldn't be fall if we didn't throw a pumpkin recipe at you. Since we love pancakes here you go! We've been making a variation of these pancakes for the longest time. However the texture on those other ones just wasn't quite where I would like it when it comes to a pancake. So just a couple little tweaks and we have this new one which I think will be our go to pancake recipe for a quite some time. If you are wondering what the hell the broccoli is doing in the picture, I thought this was a pancake recipe, you aren't the first one to think that is a weird combo. This combo is a great a solution for a number of people that we work with on a regular basis. Two staples that people usually fall short of on a daily basis is protein and veggies. Why not start your day with a healthy dose of both? Why are protein and veggies important? Particularly for people trying to lose weight these two things will likely be your biggest help in seeing measurable progress in a short period of time. By getting adequate protein, 20-40 grams, per meal you will fill yourself with bulk but with lower calories. Same goes for the veggies, due the high fiber in veggies you are adding bulk without adding calories. It's because of this that you are able to eat to the point of being full all while staying in a calorie deficit. If you are curious how much protein and fiber you should specifically be eating head over to our Calorie Calculator page and submit some information and I will get you a customized plan to let you how much of each you should be eating. This will be based on your size, activity level, and your goals. Otherwise enjoy the heck out of these pancakes, we sure did! Macronutrient InformationCalories: 95 Protein: 10.9 g Fat: 4.4 g Carbs: 3.5 g Sugars: 0.9 g Fiber: 1.6 g
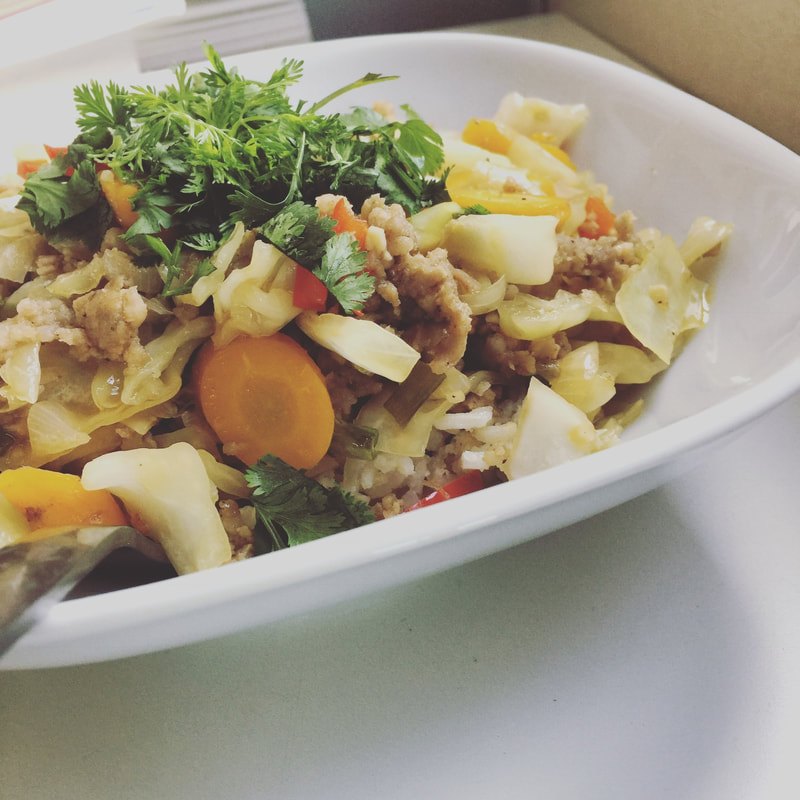 One food that I have yet to find since going gluten free is a fried egg roll...they just don't exist out in restaurants and we didn't opt for the RV with the deep fat fryer. We've had a number of our challengers post in our accountability groups about creating different versions of this dish. I finally got around to make some myself and have to say it hit the spot. We were a little spoiled too, since the two days before this my aunt picked most of the veggies that went in this dish straight out of her garden. Fresh cabbage, fresh carrots, and fresh onions!!! The only thing we added to the dish was some red pepper, garlic and the pork. Oh and a few spices and some asian sauces!
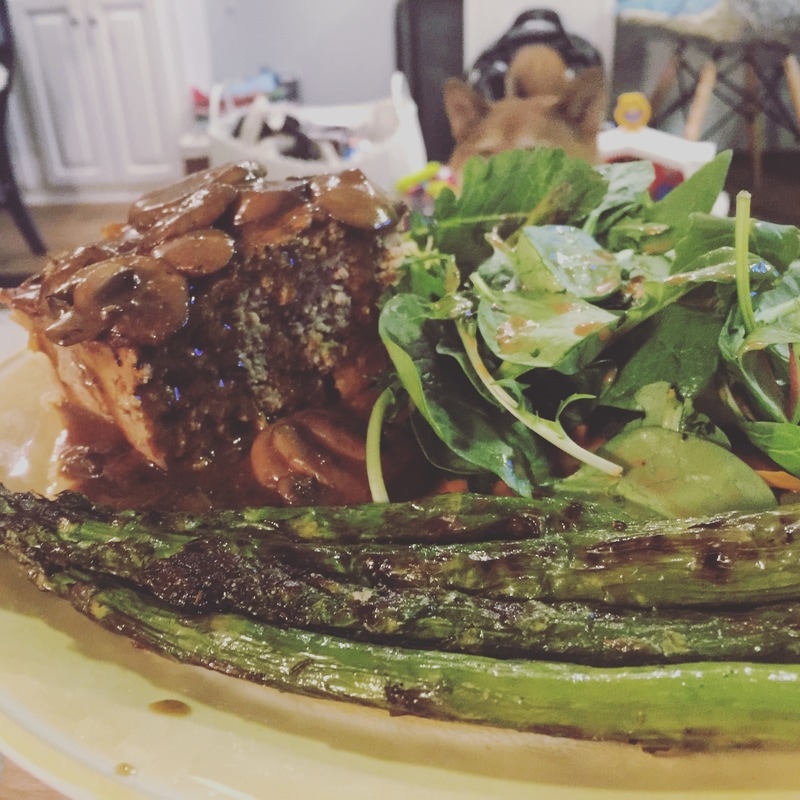 Meatloaf... it was a staple in our house growing up! My mom would always make it with beef and slather on the ketchup sauce on top. It was actually quite tasty, except for the onions. I despised onions when I was a kid. Not the flavor as much as the crunch that you would occasionally get from one that wasn't cooked enough. Times have changed quite a bit! The breadcrumbs that you would normally add to meatloaf would now make me breakout in a rash. The high fructose corn syrup in the ketchup, yeah... we are just going to avoid that if we can. That's the backstory on how this recipe got created. I suppose with mushroom sauce this maybe is closer to the salsibury steak that we would occasionally have in our tv dinners. No matter what you call it, I hope you call it delicious! We certainly enjoyed it!
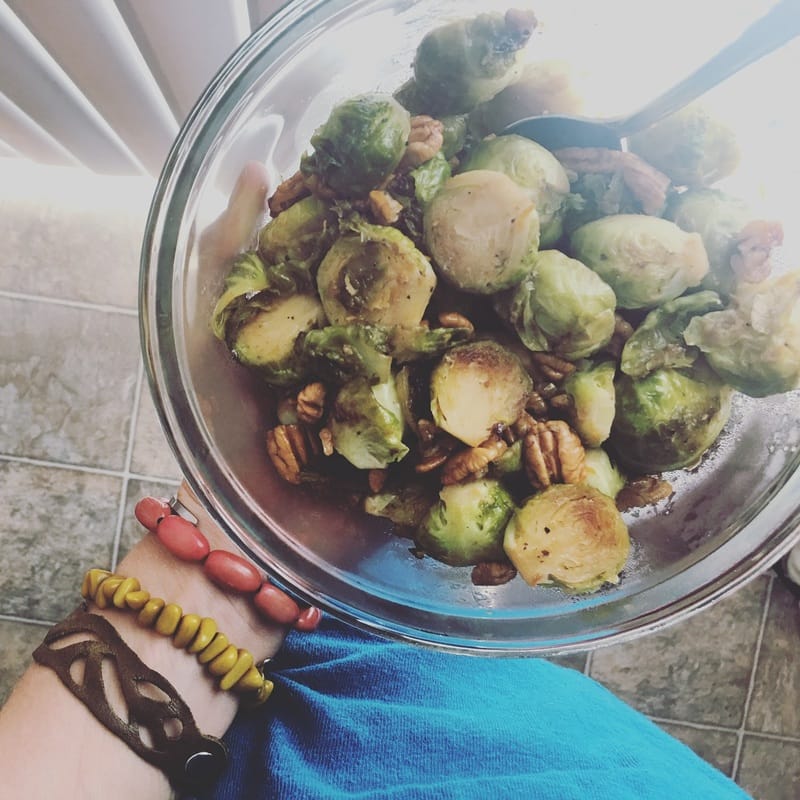 We are creatures of habit. When we find something we like we don't change. Brussel sprouts and the way we prepare them is a prime example. Our normal preparation is clean, cut, drizzle with olive oil, season with salt and roast in the oven. If we are feeling crazy we might add a little bacon, balsamic or galic. I've learned to not mess with Laura's brussels! This past weekend we did a Chrismtas dinner with my side of the family and my mom had found some beautiful brussel sprouts. I've tried exposing to my family to brussels before and other than my mom and sister in laws haven't had much luck. So I figured what the heck let's try something different in the hopes they will try it. It got a couple more to try but I don't know if I turned them to be brussel fans. This recipe was simply inspired by what was in the kitchen. We had brought some fresh pecans home from Texas. We had an orange that we didn't eat on our flight up to Minnesota and I had saved some bacon grease from our breakfast that morning! The orange definitely livened the dish up quite a bit and pecans added a nice texture contrast, so I would say this is a win and we would love to hear what you think if you make it yourself. One variation you could certainly try would be to add bacon to the dish. We didn't since we had it for breakfast that morning. But if you wanted to, just chop and cook the bacon in your skillet until the fat is rendered out, remove the bacon and start the brussel sprout process listed below. Then just re-add the bacon pieces the same time as the pecans.
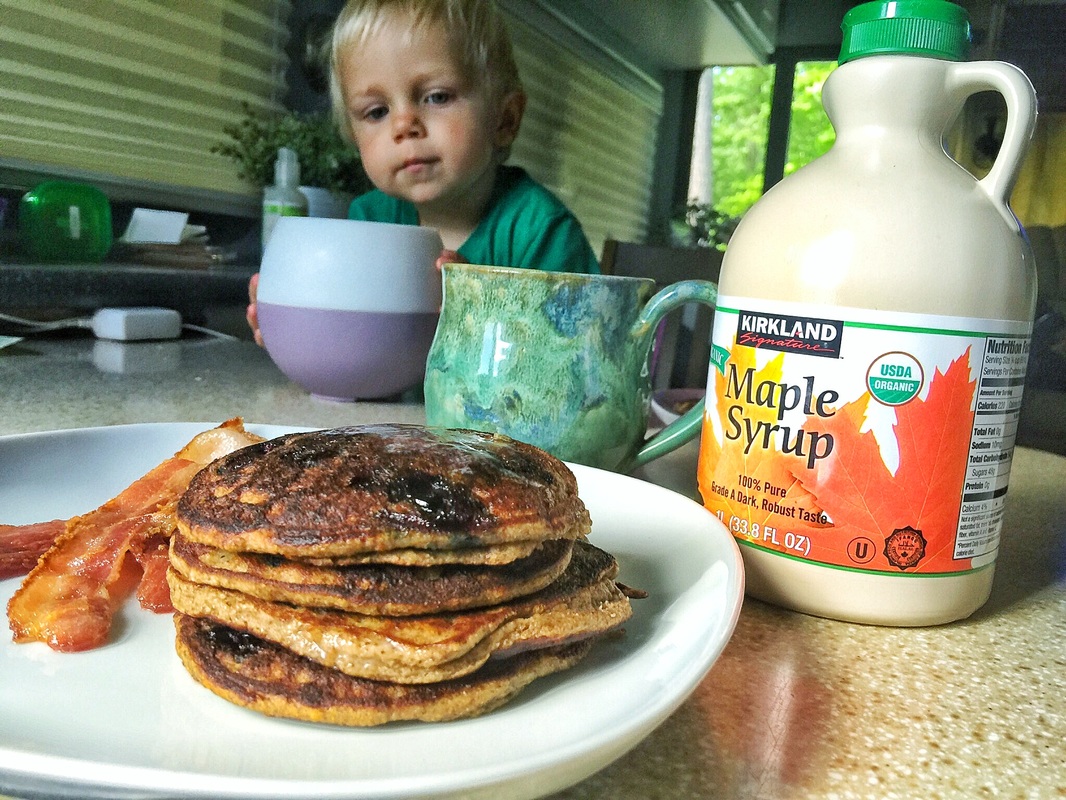
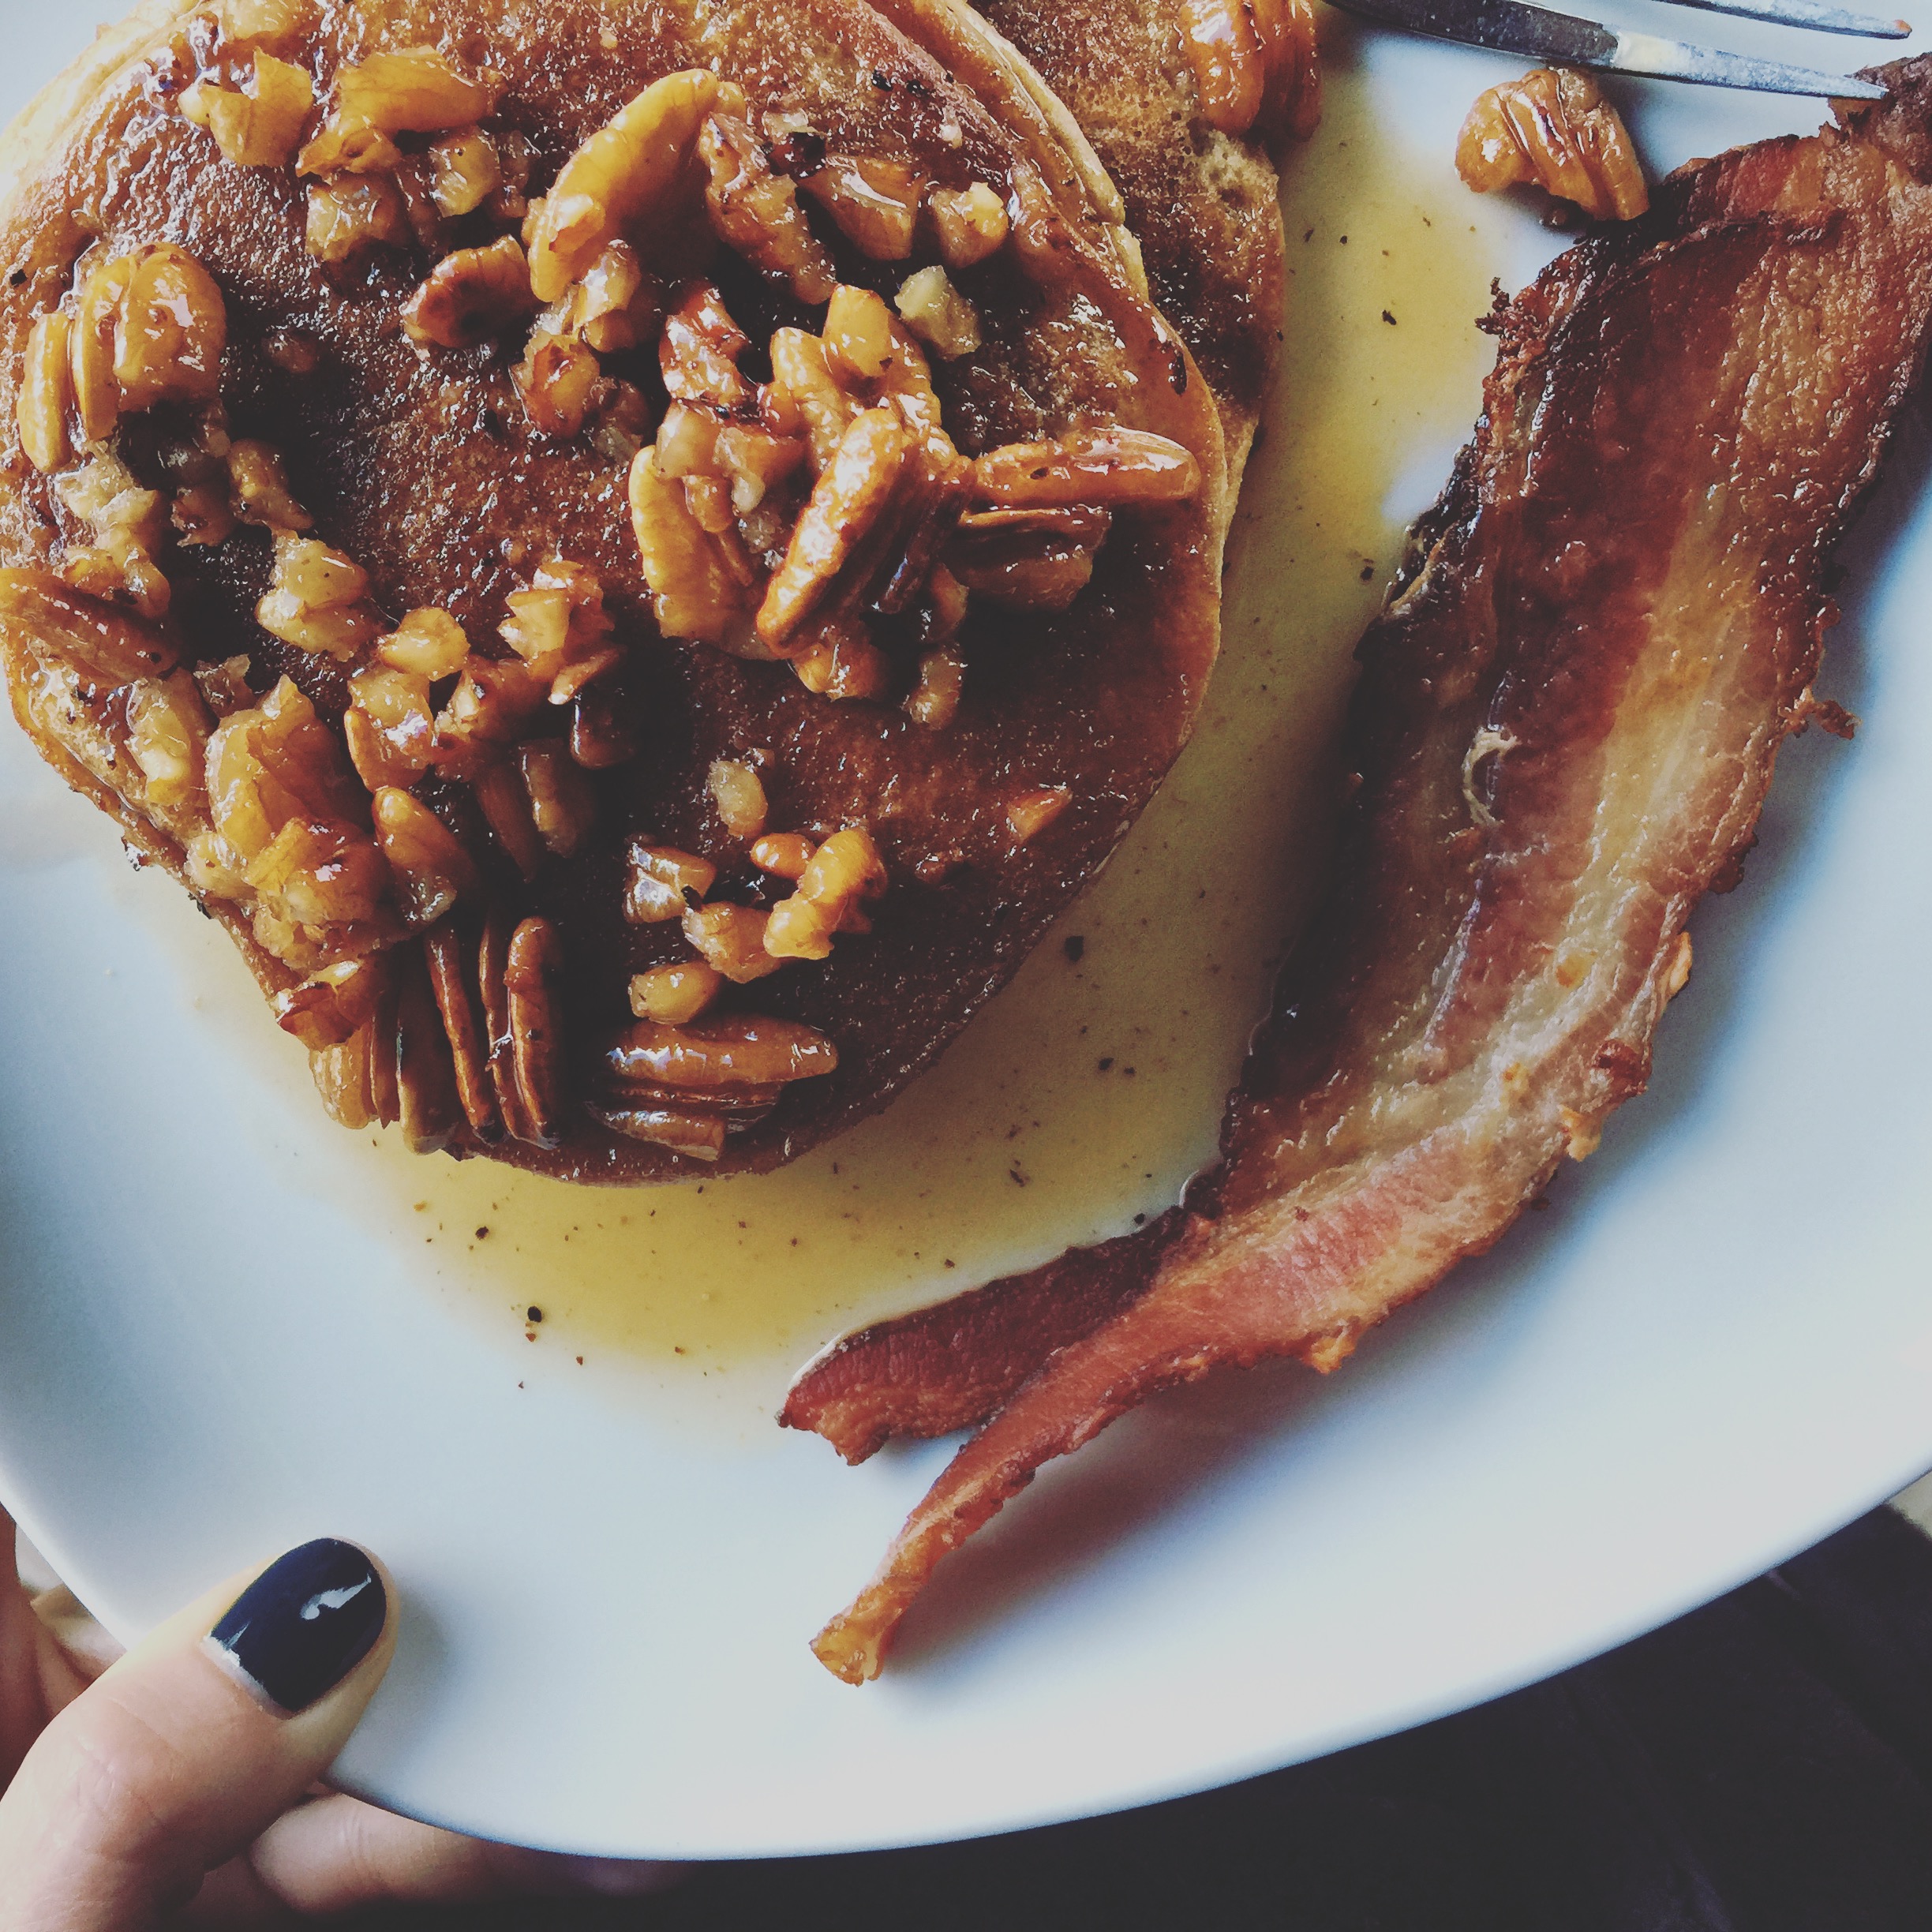 We are currently parked in a campground in central Texas between Houston and San Antonio. There isn't anything super fancy about this park or its location. One upside though is that there are pecan trees everywhere and it's pecan season! If I had the patience I could easily fill up a 5 gallon bucket in less than hour. We've been snacking on them a bit but decided to try to use them the other morning in combination with a new pancake recipe. If you follow us you know that we love our pancakes and they are a weekend tradition. You also know we need gluten free options since I can no longer eat anything glutenous! I wouln't consider these pancakes health food but they are close. The flax in them provide a ton of Omega 3 fats which are super good for you. You also get a decent dose of protein and fiber too! The sauce/sryup that I made is the thing that turns a fairly healthy pancake into a bit of a treat! Enjoy it though because it's delicious and a much better way to enjoy pancakes then use a boxed premix.
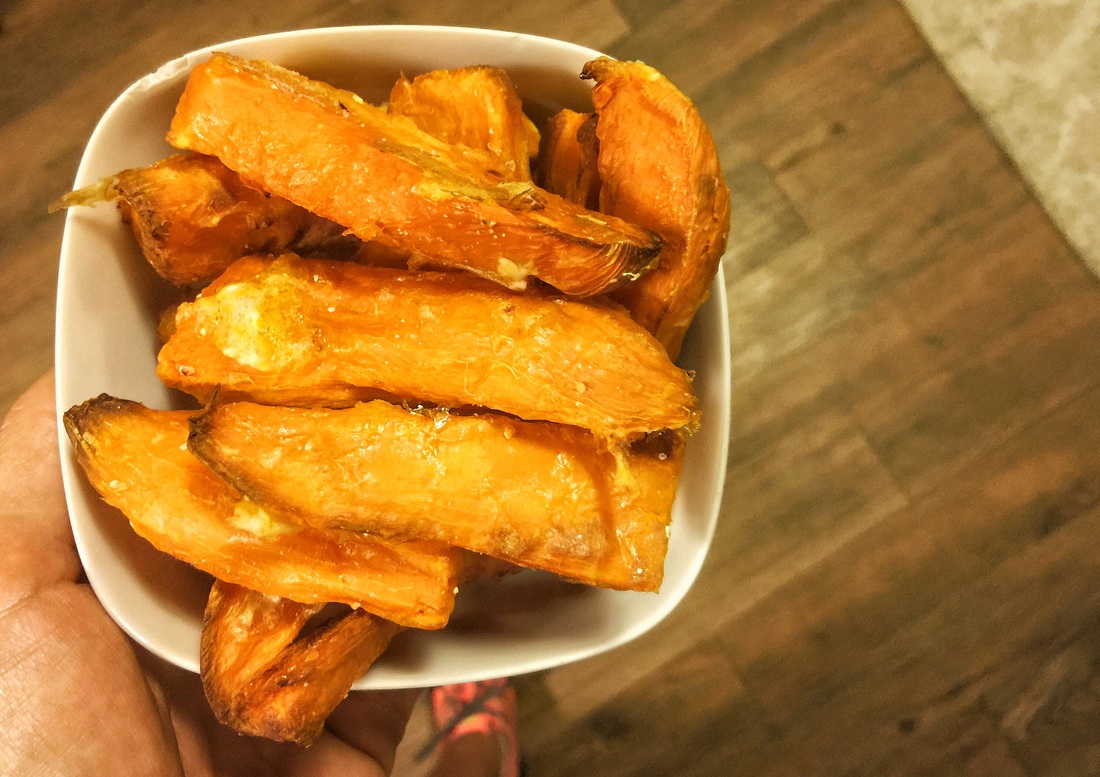
I've tried a couple dozen different ways to make baked sweet potato fries and most of them haven't turned out until now! The two things that have typically happened are either horribly burnt fries or soft squishy fries. Been there?
I wish I could remember where I saw this trick but it made all the difference. I know I saw it on some Facebook cooking school type page. They talked about the differences in sweet potatoes vs regular white potatoes. The thing that separates the two is the starch to sugar ratios. White potatoes are higher starch less sugar and sweet potatoes are just the opposite. If you are somewhat experienced cook you know that sugar burns. It's because of this and this balance that makes sweet potato fries harder to get that nice crispy texture without burning. You could approach this problem a few ways. Cook them incredibly fast so they don't have time to burn, aka fry them. Not the worst thing in the world if you are using a quality oil like coconut oil, but that becomes a pretty expensive batch of fries if you are using a whole jar of coconut oil to make them. The next option is to reduce the sugar content, that's not really an option as far as I know. The last one would be to up the starch content. That can be done! The process of adding starch is pretty simple. You could use a number of different starches to do this but I would recommend tapioca, arrowroot or corn starch/flour, I used tapioca. You create a slurry of the starch plus a little water and toss the potatoes in the slurry while they are warm and slightly softened from boiling. That way the starch mixture gets absorbed into the potato. I'm going to continue to experiment with this process and hopefully fine tune it a bit more. For now, we hope you enjoy this little tip. I would also love to find the perfect fry seasoning to add to these. If you have any suggestions drop them in the comments. 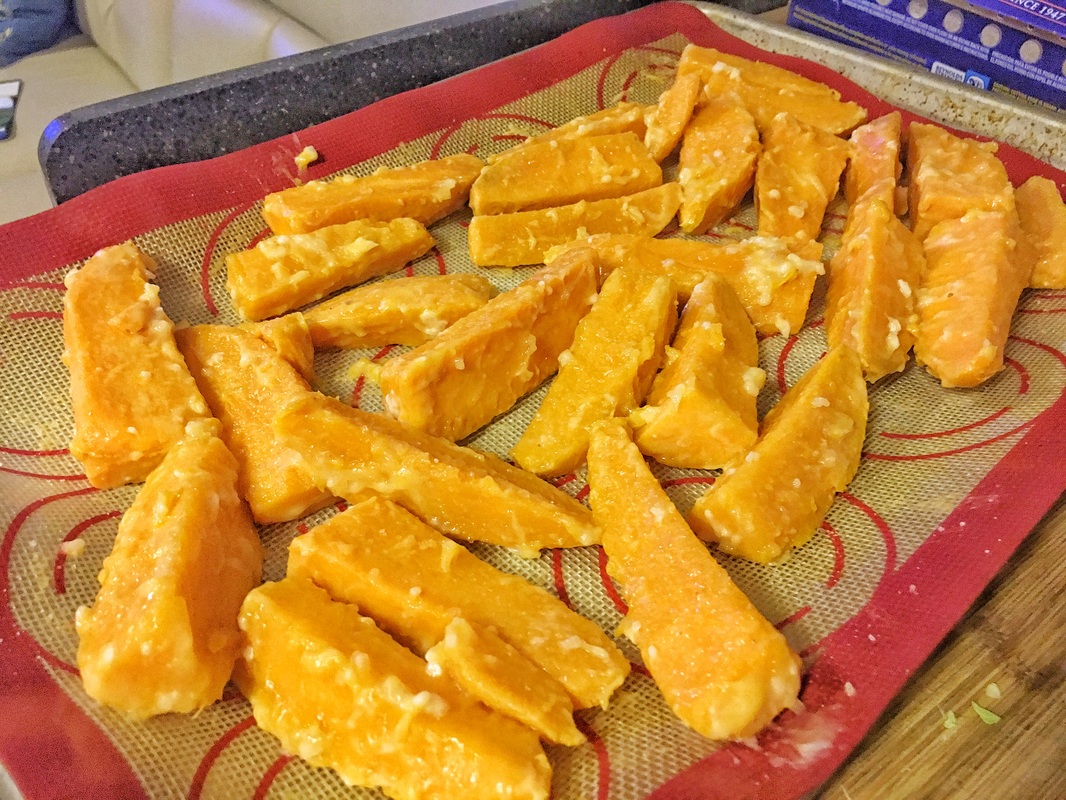
Boiled potatoes covered in tapioca starch slurry
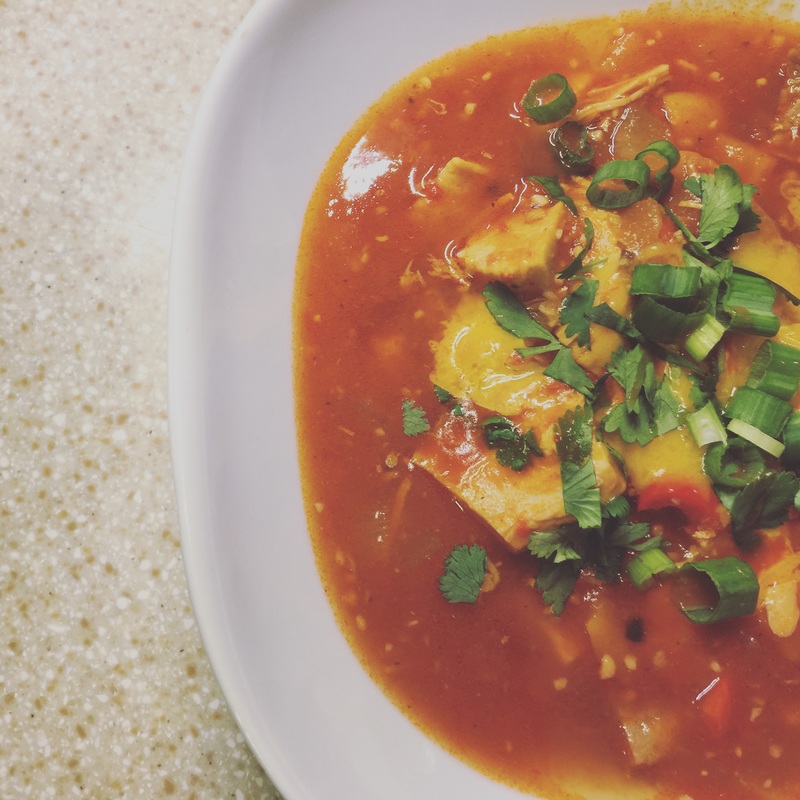
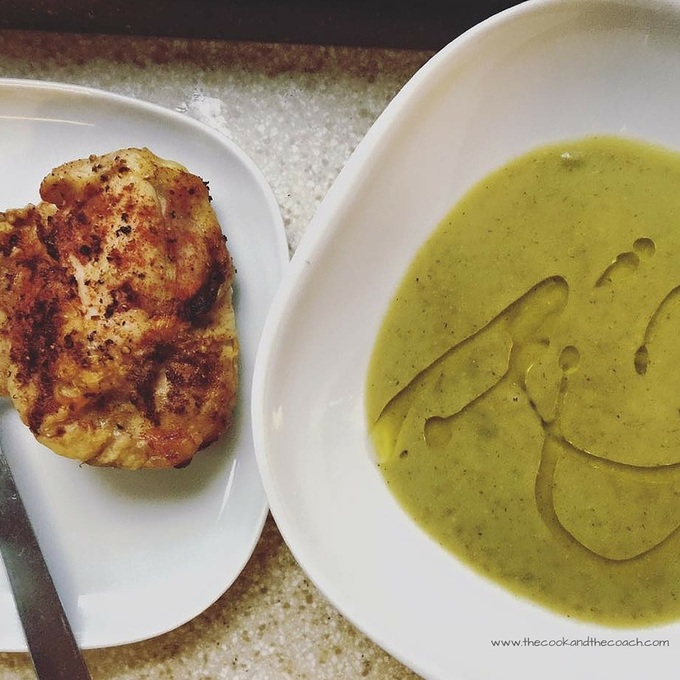
I don't know why I don't always have a batch of this soup in our fridge. So good!!! Five years ago I would have laughed at you if you would tell me that soup can be an entire meal. I guess I was used to terrible canned soups or the tiny cup of soup that you get at restaurants. Oh how the times of changed.
Now my view of soup is basically it is liquid salad! Seriously though if you make a good soup it should resemble a salad. So if you don't like to eat salad, I suggest you try soup instead. This version of chicken tortilla soup is loaded up with veggies, quality protein, and of course some amazing chicken stock. When I make soup I love to make a huge batch because it tastes better the next day! Feel free to scale this recipe up or down but it makes about 6 large bowls of soup. Also as a little bonus here is a how I like to make my chicken stock at home which is super simple. Homemade Chicken Stock
Chicken Tortilla Soup Recipe
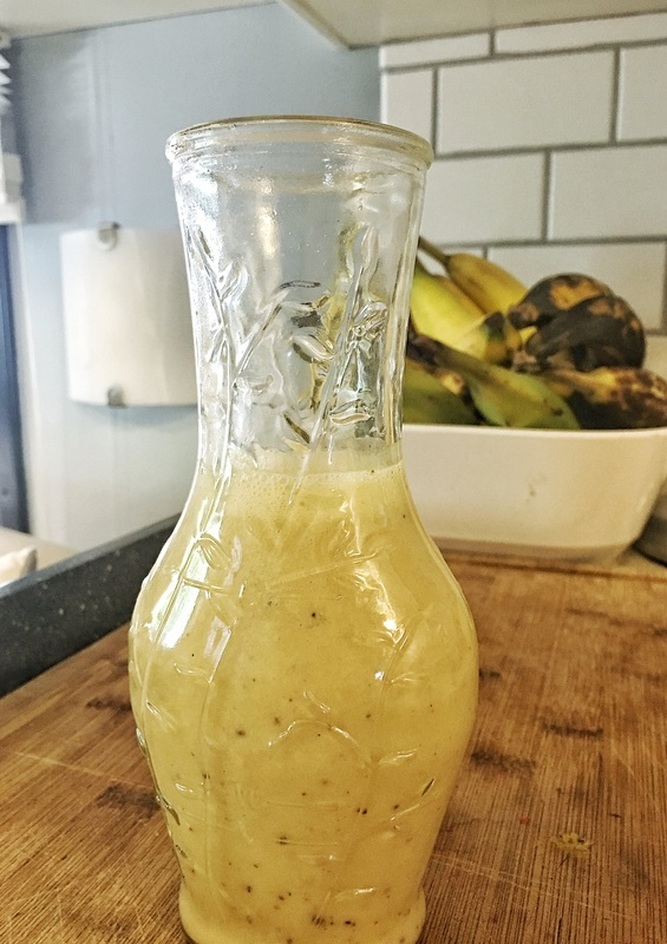
One thing we really encourage a lot of our clients to work on is to be more veggies, especially greens. One of the easiest ways to get more greens in is to eat more salads. We love our salads, and try to it one 5 days a week. We aren't just talking about a little side salad with dinner. We are talking full on, stuff my face and stomach salad that is loaded with greens and veggies. We see a lot of people that grasp that concept which is awesome, but then they douse all those quality veggies with some low quality salad dressing.
A couple of tips if you do buy store bought dressings;
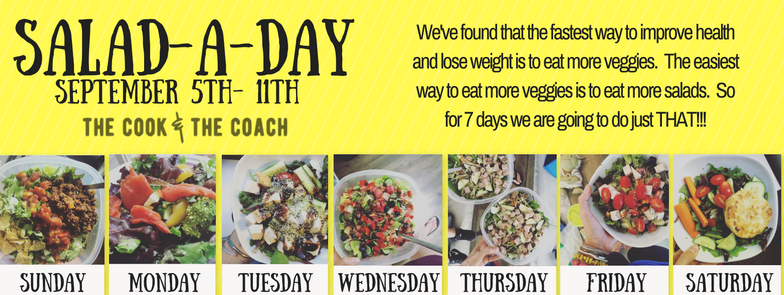
If the idea of eating more veggies and cleaning up your eating sounds like something you would be interested in, we will be hosting a special group on Facebook in a little over a week. The group will revolve around having a salad a day for week. We will provide recipes like the one above and some more tips on how to put together an amazingly healthy salad. If you are interested click on the image below and RSVP.

Laura loves curry!!! So what do you do when your wife loves curry, you make curry for her. Sometimes I'm all about doing things from absolute scratch. In the case of curry, it would be fantastic to toast my own spices then grind them fresh and use my mortal and pestle to make a paste. But let's be honest that takes time and energy.
Instead we found a pre-made curry paste, added in some fresh veggies and fish and a couple other ingredients and we had a delicious dish in under 30 minutes. This was my first time ever using fish in a curry and it turned out pretty great. If you are completely scared of fish or don't like the flavor, too bad, try it anyways. I think you will be surprised that the curry is the dominate flavor and not the fish, so it is a good way to give fish a try. Feel free to add your favorite veggies to this dish. You don't have to use what we used, we just had these on hand and that is why we love curry dishes so much, because they are so versatile. You could also sub out the quinoa for rice or even zoodles or sweet potato noodles if you want to go grain free. The possibilities are endless. We hope you enjoy this one as much as we did.
 Laura almost didn't let me make these for her. Apparently she has a thing about eating chia seeds because they get stuck in her teeth. I get it... kind of. I was able to twist her arm and get her to try them and I'm pretty sure she was glad she did. We all loved these pancakes, even Eli. Another bonus: zero chia seeds stuck in her teeth too. Talk about having your (pan)cake and eating it too! Seriously if chia seeds aren't part of your diet you need to consider adding them. Even if a few stray seeds end up in your teeth the benefits far outweigh any social anxiety from being caught with something in your teeth. Even if you do get caught it also gives you an excuse to share this amazing seed story with someone new! 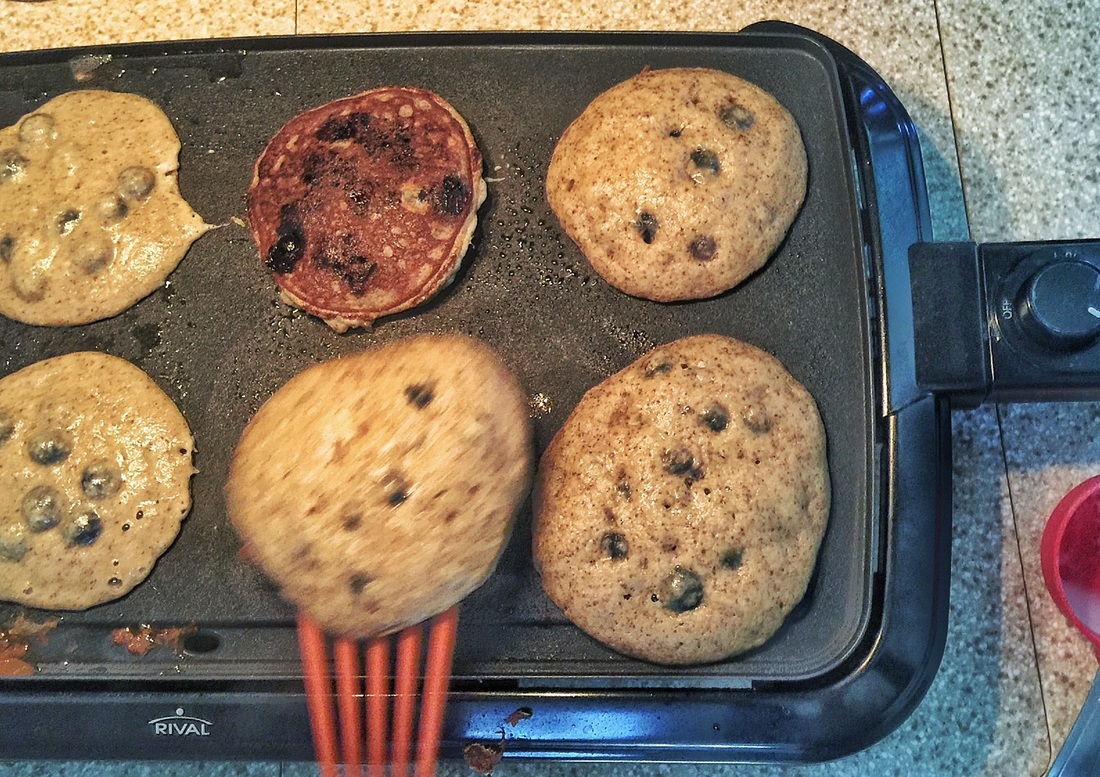
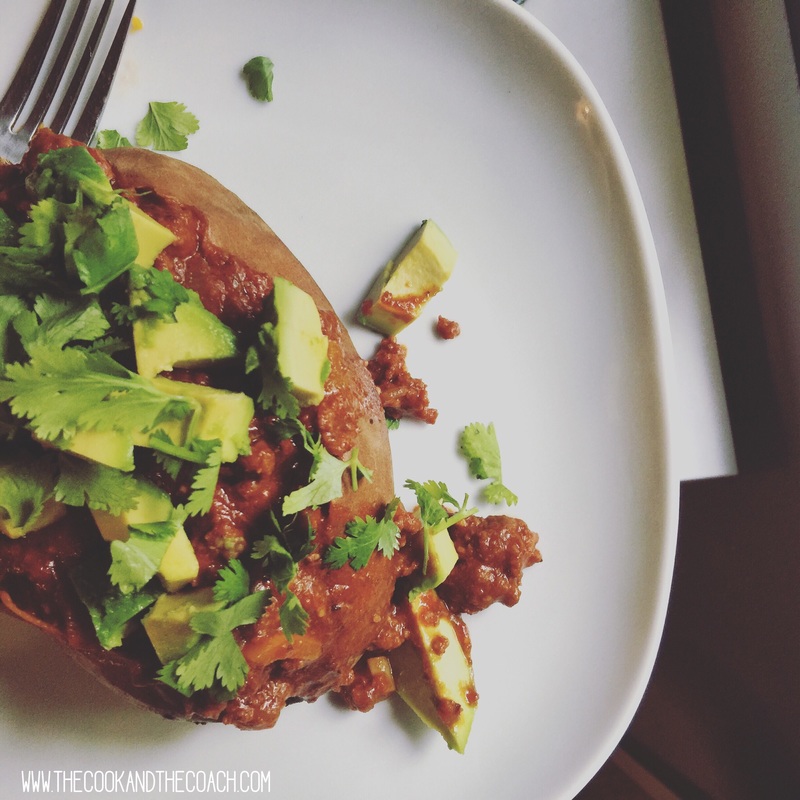
I think I first heard of Danielle Walker on one the podcasts I listen to on a regular basis. She has a pretty incredible story of beating an auto immune disease, ulcerative colitis, through dietary changes she made. It's a great story that really shows the power of food. I would encourage to check out her blog or book Against All Grain.
Danielle has a recipe for this same dish that was my inspiration for making this. It was super simple and even Eli ate it. You can pretty easily scale the spice up or down depending on if you are feeding kids or you just don't like spicy food. Eating healthy food doesn't have to be flavorless which I think a lot of people fear. You just need a well equipped spice cabinet. You could easily sub out the ground beef in this recipe for ground turkey, shredded chicken or beef if you happen to have those on hand instead.
This dish was totally inspired by leftovers. To be honest a lot of the meals we make are throw together at the last minute. We try our best to just keep healthy ingredients in our fridge, freezer and pantry. Then I (Dan) find inspiration either from Pinterest, Google, a random cooking show or something I've made before to dictate what we eat. I'm not the most creative person when it comes to other things, but food, that's my jam - pun intended!
Seriously this soup was so easy to make and you could easily scale it up if you wanted to make it for a larger group. Like most soups the key to flavor is using a flavorful broth/stock and letting it simmer for a long time. I recently made up a batch of chicken stock in our pressure cooker. Homemade stock makes a huge difference in my opinion both in flavor and quality of ingredients. I probably need to write up a post about our stock recipe. Very simply we just add water, old chicken bones, carrot, celery, onion, garlic, bay leaf, thyme, apple cider vinegar, peppercorns and a little salt into our pressure cooker. We pressure cook it for about 3 hours and it turns out great! We hope you enjoy this soup! We always love to hear if you try out our recipes, so if you give it a try, drop us a comment on the post or shoot us a message.
 Citrus and summer go hand in hand in my book. I know it isn't technically summer yet but the weather in South Alabama has felt like it is the middle of August. I'm sure if you were to talk to locals they would tell you how great the weather has been. For this Minnesota boy it's a different story. Temps were in the 80's everyday and the humidity was above 90% everyday. That's hot! Being in South Alabama we had the benefit of getting some really good shrimp and it was cheap. This has definitely been one of the things that I've enjoyed about traveling so far, local food! Getting to eat food that was picked, farmed or fished recently is so fun and adds so much more flavor. We've tried to take in local markets wherever we are and get some fresh veggies and proteins, then fill in the gaps with some food from the big box stores. I made this while in Gulf Shores, Alabama and it was super light and perfect for a warm day. We hope you enjoy it!! If you have a shellfish allergy you could easily leave out the shrimp and do a piece of baked whitefish.
I've never considered myself a baker. There is just too much measuring and too many dishes to clean up afterwards. On top of that most baked goods don't exactly line up with healthy eating. What are the cornerstones of baking; usually a combo of white sugar, flour, and poor quality fats. Basically the worst combo when it comes to health and maintaining a healthy weight.
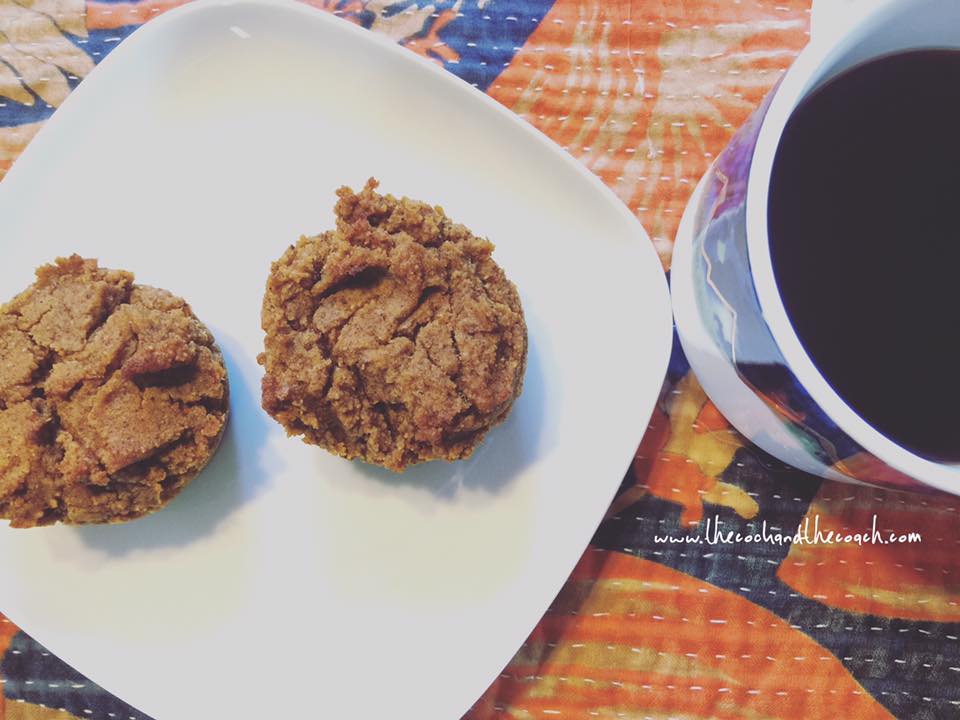
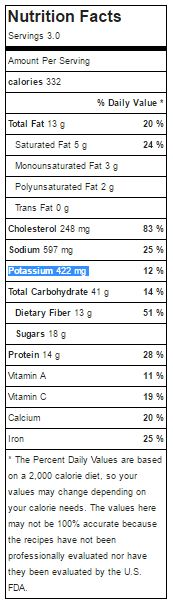
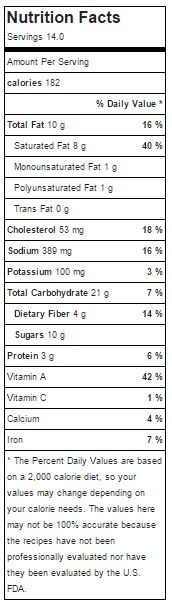
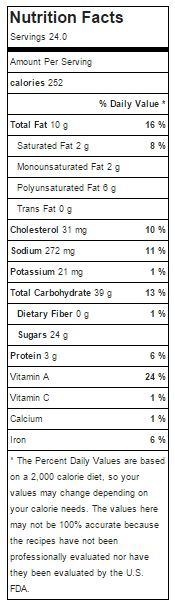
Now that I've poo pooed bake goods let me tell you about the super tasty muffins I made, lol. This recipe by no means qualifies these muffins as health food but I did remove those poor quality ingredients that cause inflammation and hormonal havoc in your body and replaced them with friendlier ingredients. The recipe that I based my recipe off of is one that my mom passed down to me. She would always make it as a bread loaf instead of muffins and I remember just loving it. Probably because of the amount of sugar that was in it! So here were my "healthy" swaps. Instead of white sugar I used dates that I pureed with a little almond milk. Instead of regular wheat flour I used a combination of coconut and arrowroot. Instead of vegetable oil I used coconut oil. As you will see in the nutrition facts below I reduced the sugar by 18 grams per serving, which is huge and when it comes to weight loss and the insulin response that you would get from eating it. Swapping out the flours will help with GI issues that people have from gluten, along with the high Glycemic Index that comes along with regular wheat flour. Coconut oil versus vegetable oil is a no brainer unless you are still living in the 1980's and think saturated fat will kill you. This are super simple to make and fairly guilt free as long as you don't eat 6 of them. They are a great kick snack for our 16 month old son too, which is super convenient. Hope you enjoy them! Paleo Pumpkin Muffins
Mom's Pumpkin Bread
Last Call for The Master's Hammer & Chisel Test Group
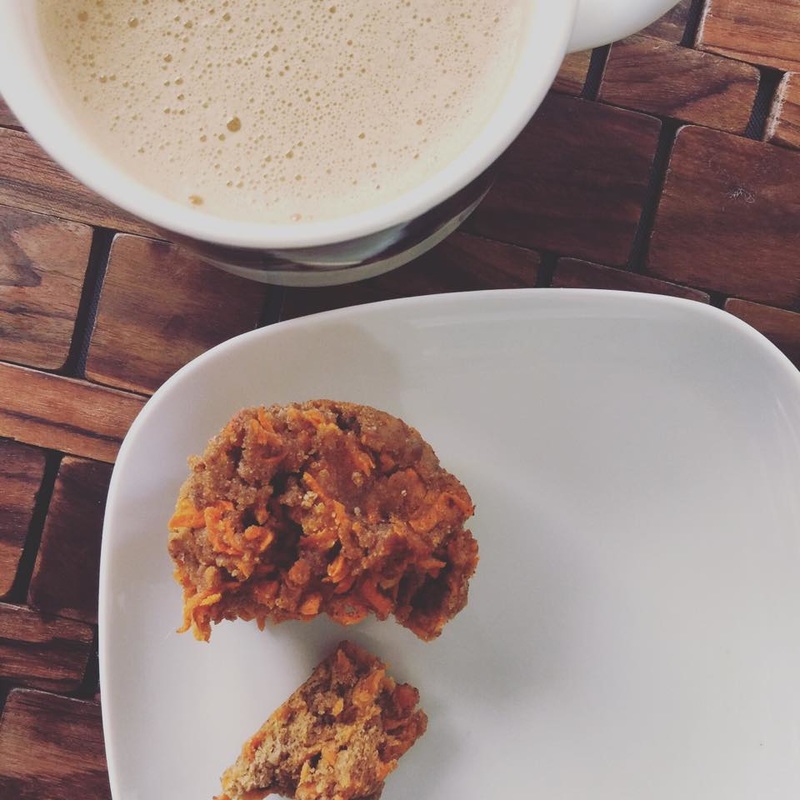
Carrot cake is straight up my jam! Hands down, best cake! I love the sweet and spice! I would eat it all the time if it was available.
Given my new gluten free life, I have had to make some sacrifices and cake is one of them. Just this past weekend at my nephews birthday party I was forced to pass on the delicious Mickey Mouse cake. As hard as that was I was just glad I didn't have to say no to carrot cake. That would have just been tough. Avoidance has been my main course of action. Recently though I just had a craving for carrot cake. Maybe it was the fall weather but something made me think of it and that led to a google search... "Gluten free carrot cake recipe" Low and behold I found a really good one and we had all the ingredients so I decided to do some baking. I usually don't bake, that is more Laura's area of expertise! Measuring is tough! I did it though and this muffins turned out awesome! The recipe that I found and tweaked was on a website, Primarily Inspired. Hats off to Kelly for the inspiration for this recipe! We just did the muffin/cupcake recipe but she has an icing that goes along with these too if you want it to be even more desserty, that's a word right??? The following morning Laura was scrolling her IG feed and stumbled across a pic from a local coffee shop and how they do a Orange, Maple Latte. She tried hard to convince me to drive 30 minutes to go get a coffee. I fought hard and told her I would just make her one instead. Since we don't really do dairy either we opted for a "keto coffee." Although given the maple syrup in it, we probably can't call it a "keto" coffee but oh well you get the idea, it has butter in it and other delicious things. This was super simple and super tasty. I have no idea how it compares the the coffee shop latte but we will do this again. It paired perfectly with the carrot muffins too. Pure breakfast bliss!
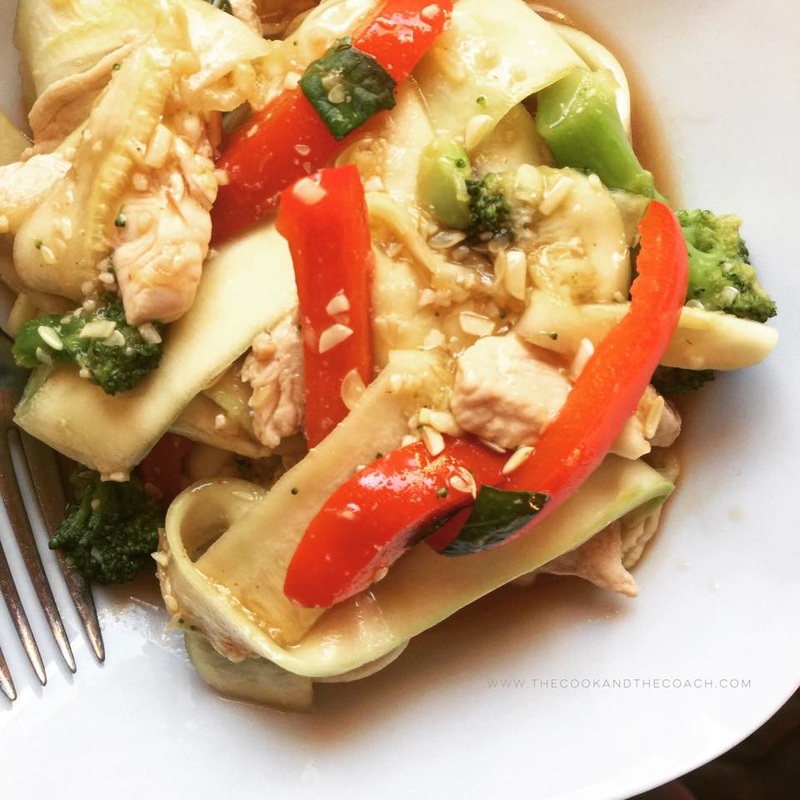
Who else loves Thai food??? Yeah I could pretty much eat it everyday. I love the flavor profiles of sweet, salty, sour, and spicy...it's just so good! The noodle dishes are probably my favorite when we go out to Thai restaurants. My go to's are Pad Thai, Pad See Ew, or Pad Kee Mao (Drunken Noodles). Given my new intolerance of gluten, I am a lot more cautious when it comes to ordering food at restaurants. I know most asian noodles are made from rice flour, but I guess I just have trust issues, especially when you add the sauce in on top of that. For example I had no idea soy sauce had wheat flour in it, prior to becoming allergic to it...and most Asian kitchens use soy in everything...so it just makes me a little nervous!
With all of that, I decided to try to recreate a Drunken Noodle dish to ensure that it is 100% gluten free. It's not a perfect representation of the authentic dish but it was pretty tasty.
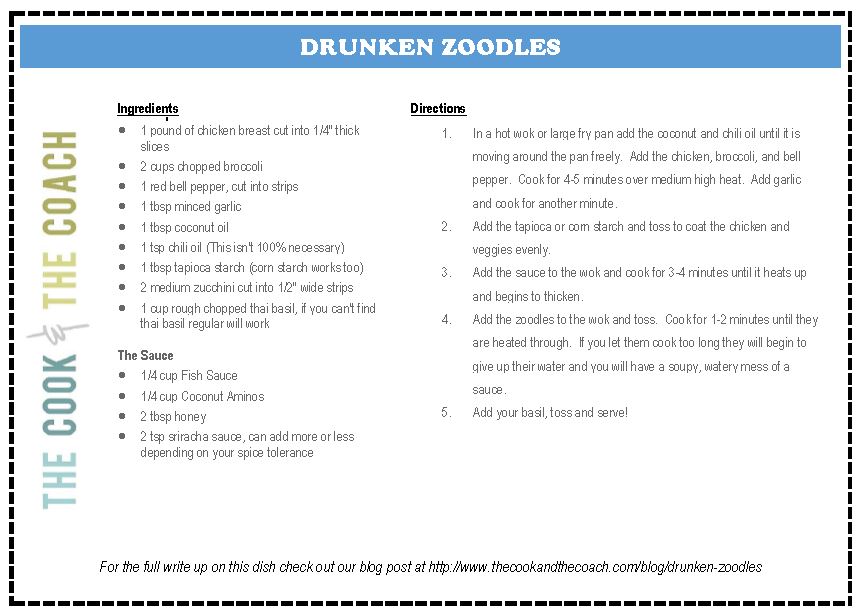
Download Recipe Card for Drunken Zoodles
We love eggs!!! We eat them daily, which means we cook them daily. We like our eggs over easy to over medium, there is just something about that runny yolk that just makes eggs so good. I'm not sure where I picked up this trick on cooking the perfect over easy egg but it is so awesome and easy to do. You don't have to worry about breaking the yolk open when you flip it or try to get them out of the pan. Once you master it, which won't take long, you will have a super simple way to cook your eggs perfectly every time.
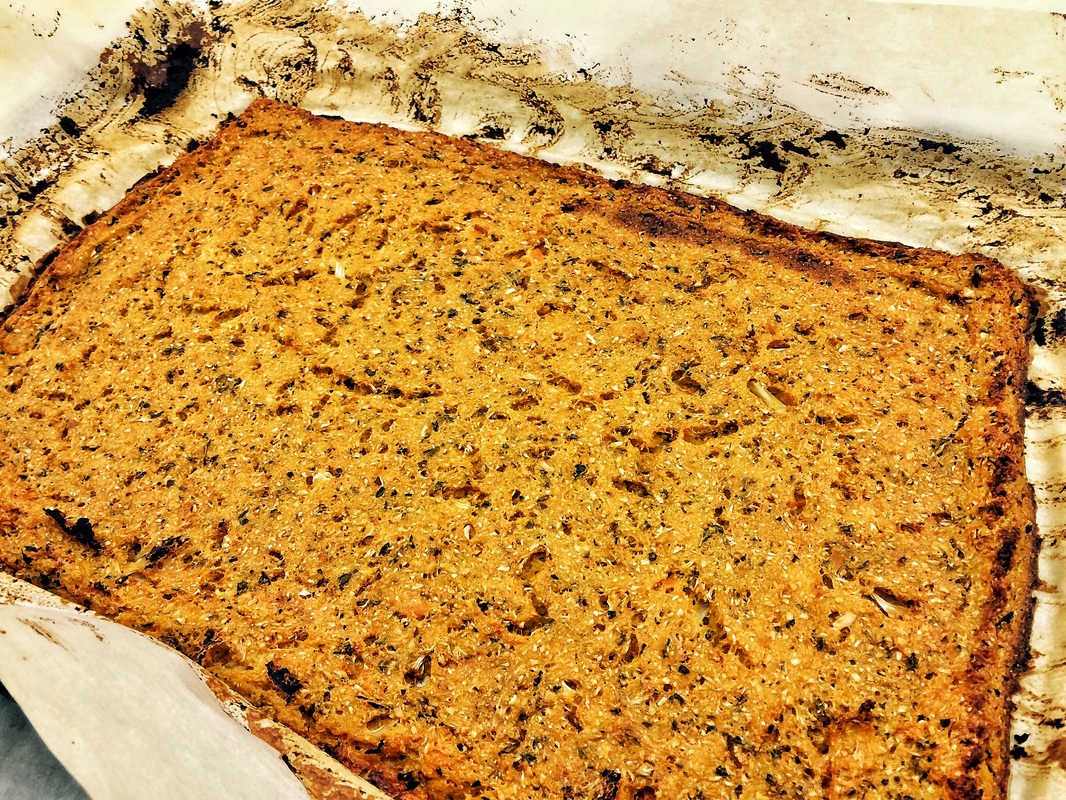
So this week was an experiment for me on our quest to make a new meal for a Monday post. We've tried cauliflower crust pizzas in the past and really haven't had any luck with flavor or texture. We love the idea of pizza that we can eat without any guilt so we wanted to give it another try.
So this time I thought it would be fun and tasty to add sweet potato to the cauliflower. This would give it a bit of that sweet flavor that you get from regular dough when you add honey or sugar. I was also hoping it would help crisp up the crust a bit more. If you can't tell by words like "experiment" and "hoping" this didn't quite turn out the way I had hoped. Although tasty it didn't quite have the texture that I was hoping. The outside got crispy but the interior stayed a little on the soft side. It was definitely a fork kind of pizza. Feel free to make some suggestions if there are any bakers out there that know a way to add more of crunch and firmer texture. I'm thinking maybe a little more tapioca starch and a higher heat when I bake it next time. 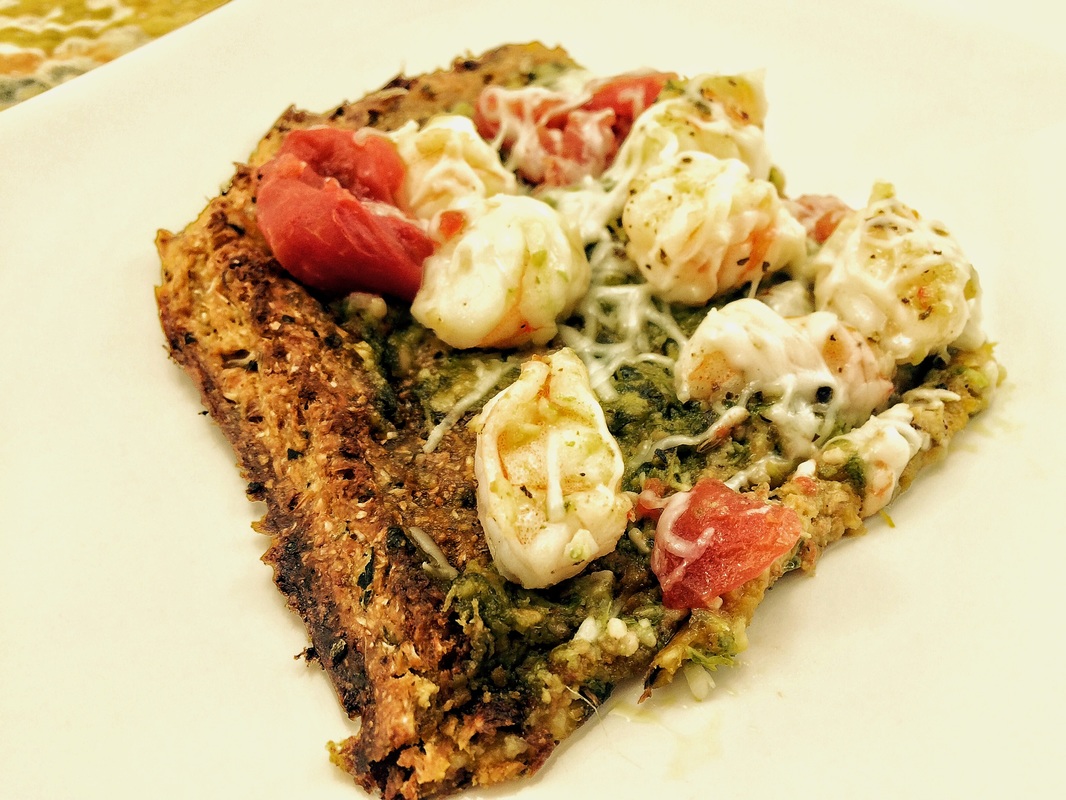
Once I master this crust I will post the recipe cards that you guys can download. Until then I would appreciate any feedback on how I could improve this recipe and process.
Make it a Great Monday! 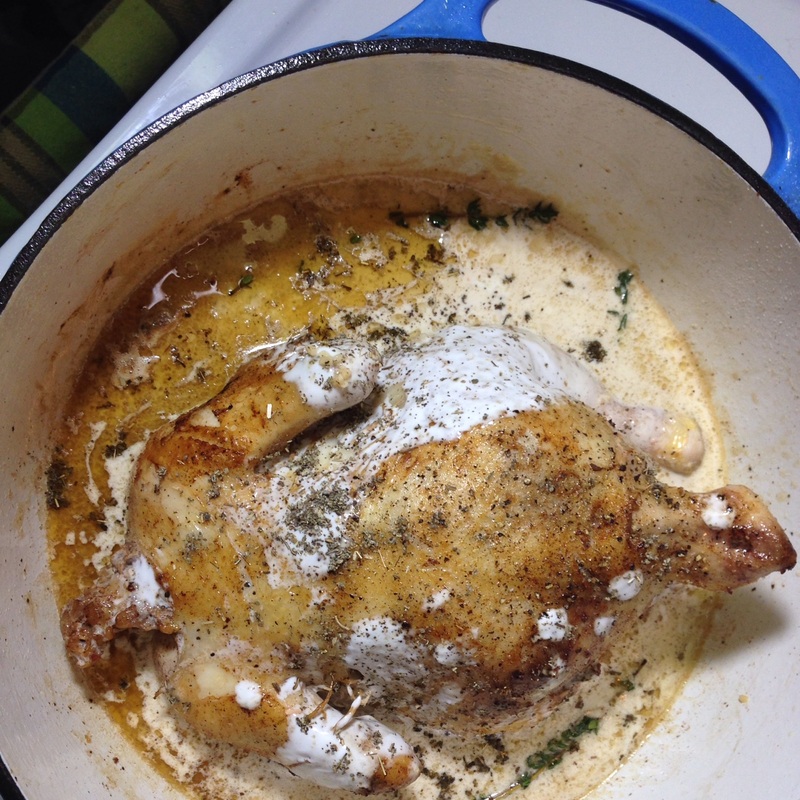 I found this on Pinterest and made this when Dan was out of town a few years ago but haven't made it since. I've told him about it...and raved about it...but he thought it sounded weird so we never tried it again! UNTIL last night :) We buy whole chickens at Costco because they're so cost effective and delicious. We then stick them in the freezer to use at a later date. Earlier this week Dan took one out of the freezer and was going to throw it in the crockpot, but then forgot about it...which gave me the perfect opportunity to cook something for him for a change! Plus, it gave me a chance to prove him wrong and show him that this is actually a delicious way to cook chicken. Win-win! Here's the original recipe: Jamie Oliver's Chicken in Milk It's pretty simple...but here's what I did: 1. Preheat the oven to 375 2. Season the chicken with salt/pepper. Brown the entire chicken in 3 tbsp of butter & 2 tbsp of coconut oil. Brown one side and then use a tongs to flip it and brown every side 3. Put all these ingredients into the dutch oven with the chicken.
4. Bake for 90 minutes Wa-lah!! 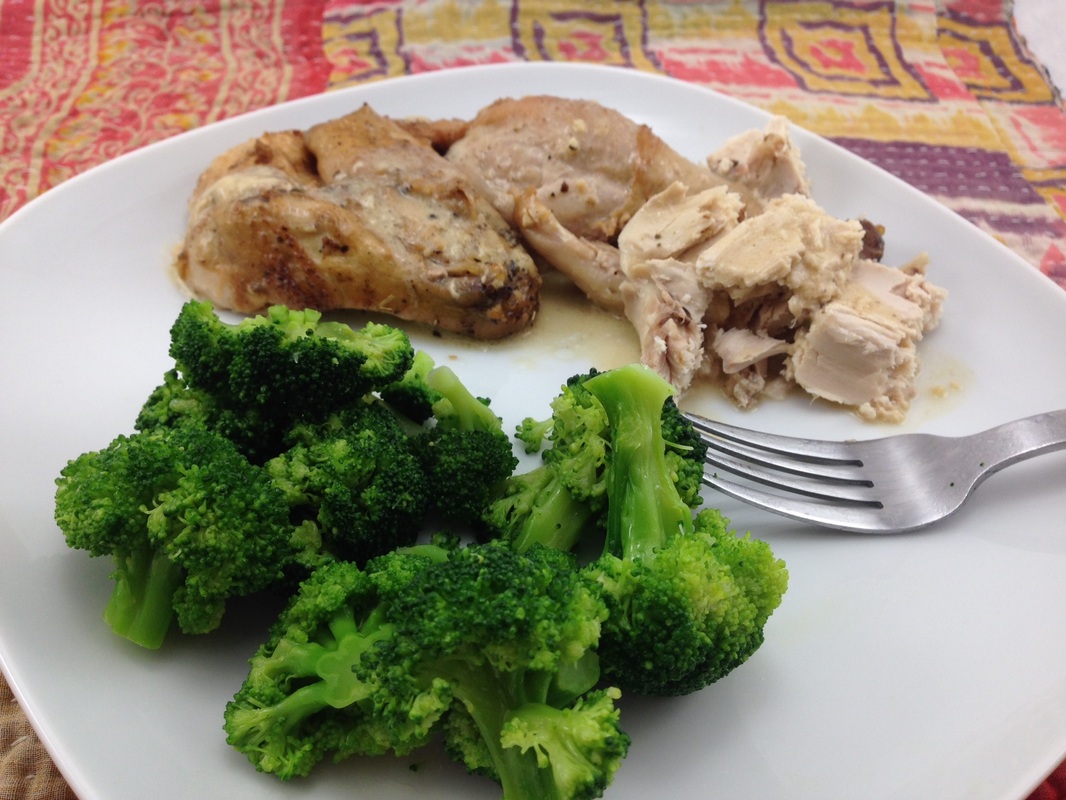 I also figured I'd throw in this sweet picture...just because. A boy and his dog. They're so sweet!!  We are one week away from everyone's favorite holiday, St. Patrick's Day!! Ok, that might be a stretch. After green beer the thing that screams, "Let's Celebrate!" is corned beef...am I right?? It's funny that corned beef and more specifically corned beef and cabbage is synonymous with St. Patrick's Day even though in Ireland it really isn't a staple dish. They actually serve bacon and cabbage, which is definitely not a bad alternative. Corned beef was substituted by Irish immigrants when they came to the United States. You can thank me for your food history lesson later. . Last year was the first year where I decided to make corned beef from scratch. I thought we would have people over for St. Patrick's Day, eat some beef and drink some beer. I hadn't done a lot of research into how to actually make it, so a couple days prior to wanting to serve it, I went out and bought some brisket, thinking you just need to add some pickling spices to it as you cook it. I was a little shocked when I found out that the curing process actually takes 7-10 days depending on the size of your brisket. Oops... Well that didn't stop me from making it. I just had to procure (no pun intended) some unique ingredients that I wasn't able to just walk into a regular grocery store and pick up. The two ingredients that I had to order online were juniper berries and saltpeter. Saltpeter is another name for potassium nitrate. Yeah, I added potassium nitrate knowingly to food that I was going to eat. Before you go and call the nitrate police, I would suggest you read this article from Chris Kresser, The Nitrate and Nitrite Myth: Another Reason Not To Fear Bacon. The following stat is from his article which he gives reference to and I thought it was a pretty big eye opener. It may shock you to learn that one serving of arugula, two servings of butter lettuce, and four servings of celery or beets all have more nitrite than 467 hot dogs. (2) And your own saliva has more nitrites than all of them! Assuming you are eating fairly healthy, there is a chance you are consuming a decent amount of nitrate rich vegetables. Numerous brands, like Applegate, have cashed in on the fear of nitrates by providing meat products that are branded "No Added Nitrates." I wonder if we should start demanding nitrate free celery. Sounds kind of silly right? The funny thing about companies that claim to have "nitrate free" or "uncured" products is that a majority of them use celery powder to "naturally cure" their products. If you look at Applegate's bacon there are asterics after the saying "No Added Nitrites or Nitrates." Those asterics direct you to a statement that says "Except for those naturally occurring in sea salt and celery powder." It doesn't say how much of those ingredients are added but it doesn't take a genius to figure out that they are adding those things to essentially give you the same product as the rest of the bacon on the shelf. I will give Applegate credit for using pork that hasn't been treated with hormones or antibiotics.
There is one problem that has been linked to nitrates is if they turn into nitrosamines. I learned about this by reading an article at Authority Nutrition, which links to some research study abstracts. If you want to read it, click here. If nitrates are exposed to high heat (350 degrees and up) during the cook process than some of those nitrates will turn into nitrosamines. This goes for all nitrates but when was the last time you grilled some celery?? The way to safeguard your bacon, ham, and hot dogs is to cook them at lower temperatures. If you are grilling hot dogs in the summer time don't cook them until they are charred. With your bacon, cook it at a medium to low heat. With your corned beef, cook it slow in a slow cooker or dutch oven. I hope this has made you think twice about the fear of nitrates in your food. If you want to make your own corned beef, I say go for it. You might be a little late for St Patrick's Day this year, but in my opinion any day of the year is a good day for corned beef. The recipe I used comes from Alton Brown and the Food Network website. The only thing that I changed was that I followed the curing instructions that were on the saltpeter container that I got rather than using the 2 tablespoons that he recommends. 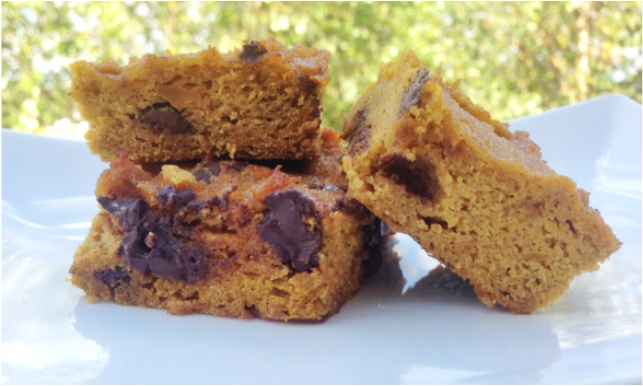 Does anyone else use the app Timehop? Yep...I do and it's so much fun. I love to see what I was posting about 1 year ago, 2 years ago or even 6 years ago on Facebook or Instagram. |
Ingredients
|
Directions
|
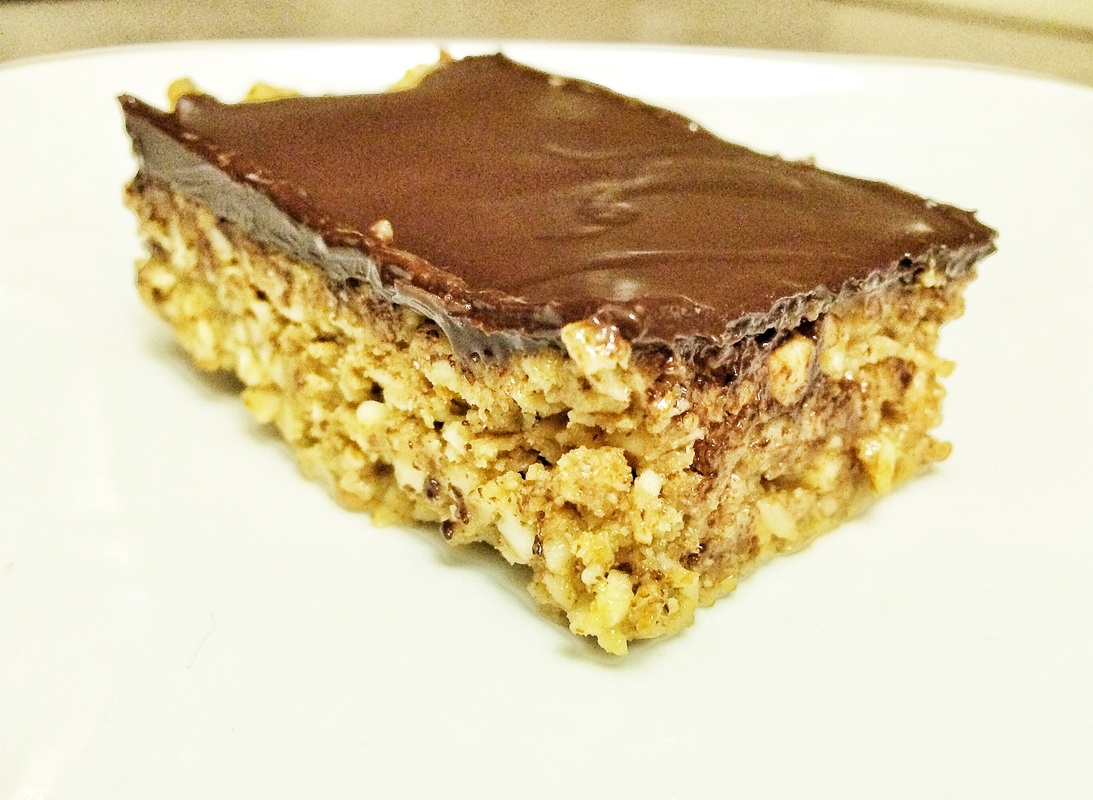
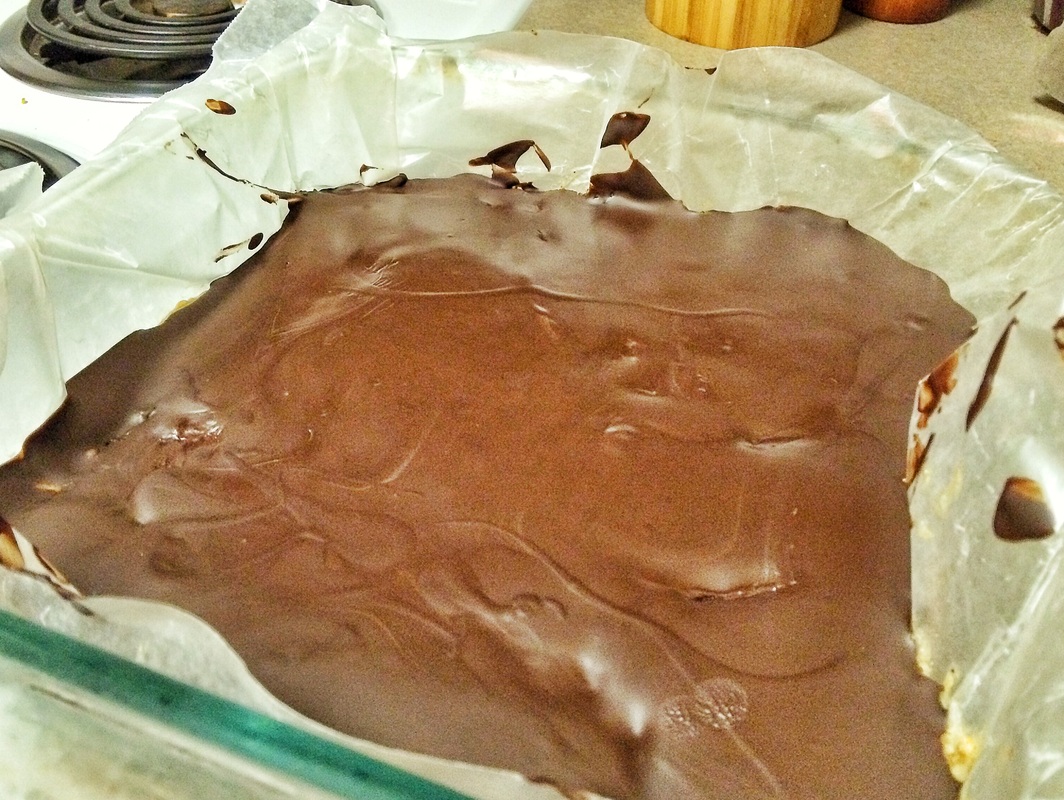
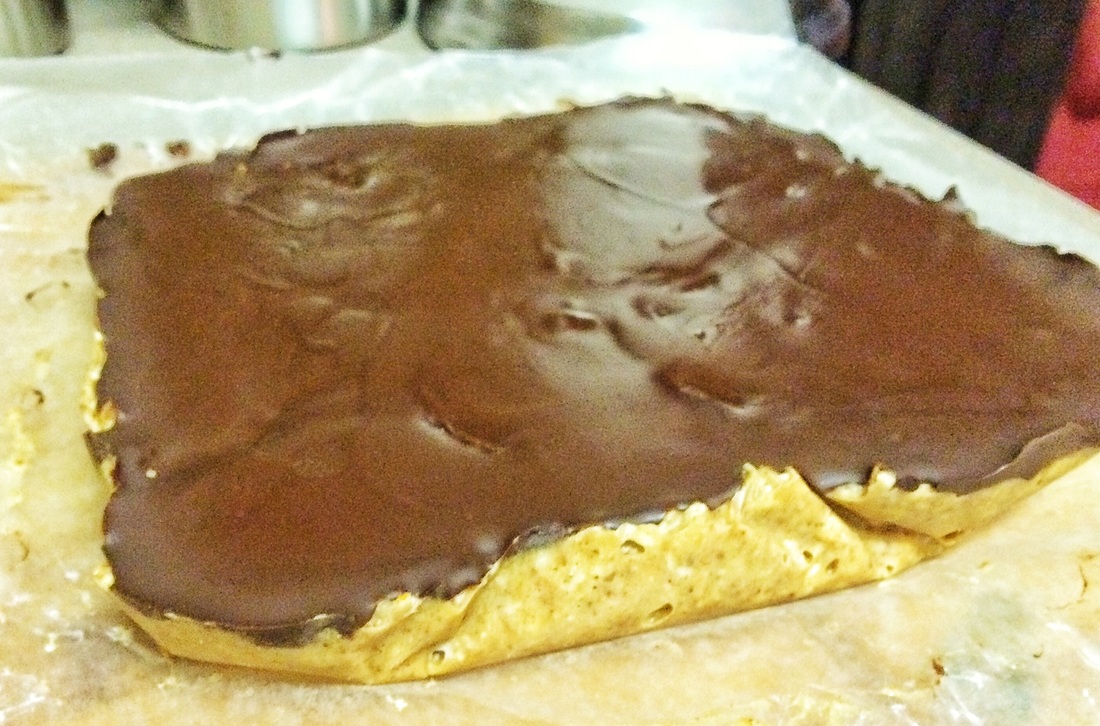
The original version of this bar is one of my all time favorites. How can you go wrong with chocolate, peanut butter, crispy Special K cereal, and tons of sugar? Given our new found healthy living lifestyle eating bars like that isn't a frequent occurrence. That doesn't necessarily mean I will never eat the original version again, but try to make it a very infrequent indulgence. Not to say the Paleo version is necessarily healthy, but there isn't the guilt of eating a bunch of processed food and sugar.
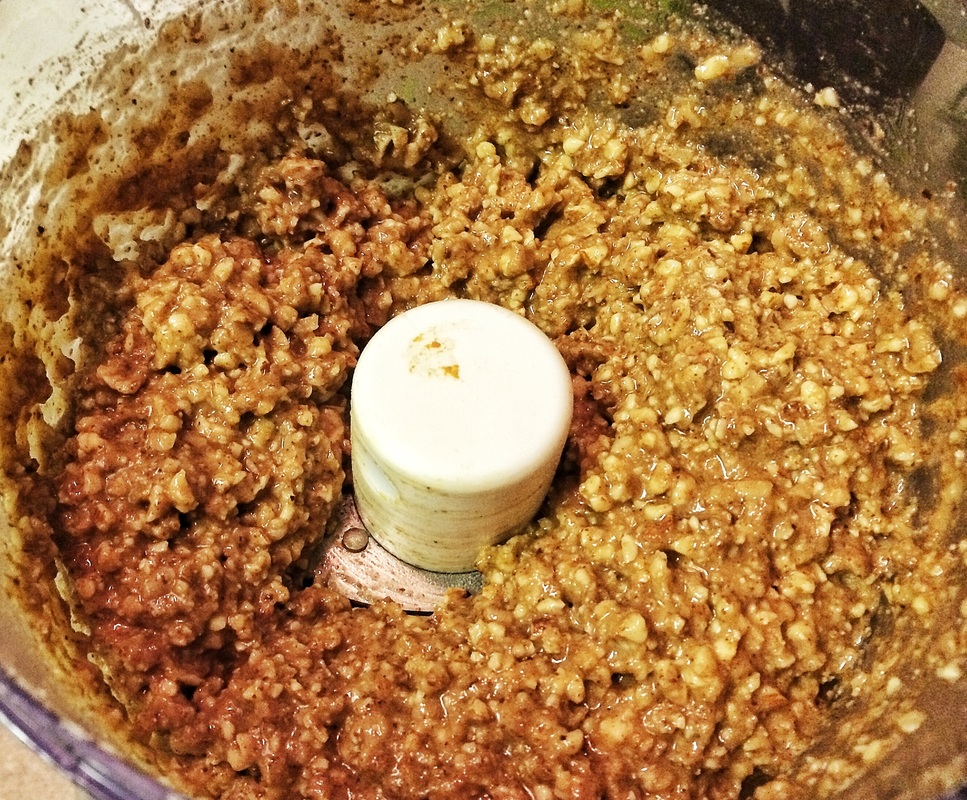
So ever since the 4th of July where a friend of ours made the original version, I had the idea of wanting to try to find a healthier option. I will be the first one to admit that I'm not a baker and have never been one to make desserts. With cooking I don't mind experimenting and just throwing things together. With stuff like this though I have no idea how to balance flavors so I had to do a little research, so this recipe was found on The Paleo Mom's website. The ingredients listed below is a slight modification from hers, due to the bars being a little bit on the gooey side and a little bit on the sweet side. I think that could have been because we used a Justin's Maple Almond Butter, it was all we had in the house. So if you can try to find a plain almond butter to cut a little bit of that sweet, unless you really like sweet desserts.
So ever since the 4th of July where a friend of ours made the original version, I had the idea of wanting to try to find a healthier option. I will be the first one to admit that I'm not a baker and have never been one to make desserts. With cooking I don't mind experimenting and just throwing things together. With stuff like this though I have no idea how to balance flavors so I had to do a little research, so this recipe was found on The Paleo Mom's website. The ingredients listed below is a slight modification from hers, due to the bars being a little bit on the gooey side and a little bit on the sweet side. I think that could have been because we used a Justin's Maple Almond Butter, it was all we had in the house. So if you can try to find a plain almond butter to cut a little bit of that sweet, unless you really like sweet desserts.
Ingredients
| Directions
|

The Cook & The Coach
Healthy is a LIFESTYLE.
Not a destination.
We want to help you build that lifestyle which will then help you
** have CONFIDENCE
** become STRONG (mentally and physically)
** lose fat
** have more ENERGY
and finally
LIVE FULLY!
 RSS Feed

Categories
All
3 Day Refresh
Accountability
Asian Flavors
Avocado
Baby Food
Baby Led Weaning
Bacon
Beachbody
Beets
Black Beans
Black Beans
Breakfast
Brownies
Brunch
Busyness
Chicken
Christmas
Coaching
Coffee
Curry
Dairy Free
Desserts
Dinner
Do It Yourself
Eat Local
Eggs
Faith
Fish
Fitness
Fit Pregnancy
Food
Food Substitutions
Fruit
Gluten Free
Goals
Gratitude
Grilled Vegetables
Guacamole
Gumbo
Health
Healthy Desserts
Healthy Desserts
Healthy Eating
Healthy Fat
Holiday Eating
Ice Cream
Jesus
Jicama
Kale
Life On The Road
Low Carb
Low Carb
Macros
MakeANewMealMonday
Meatball
Minneapolis
Motivation
Muffins
Network Marketing
Nutrition
Opportunities
Paleo
Pancakes
Party Snacks
Pesto
Photography
Pizza
Pork Tenderloin
Positive Mindset
Pregnancy
Prenatal Vitamins
Pressure Cooker Meals
Ravioli
Restaurants
Restaurants To Try
Risotto
Roasted Vegetables
Roulade
RV
RV Life
RV Remodel
Salad
Salmon
Seasonal Meals
Shakeology
Slaw
Sleep
Soup
Spices
Squash
Stress
Superfood
Tacos
Thai Food
Thanksgiving
Travel
Trust
Turkey Sausage
Uptown
Vegan
Vegetarian
Walleye
Water
Weight Loss
Weirdvegwednesday
Willpower
Workouts
Archives
November 2019
October 2018
September 2018
April 2018
March 2018
February 2018
January 2018
November 2017
October 2017
September 2017
July 2017
June 2017
May 2017
April 2017
March 2017
February 2017
January 2017
December 2016
November 2016
October 2016
September 2016
August 2016
July 2016
June 2016
May 2016
April 2016
March 2016
February 2016
January 2016
December 2015
November 2015
October 2015
September 2015
August 2015
July 2015
June 2015
May 2015
April 2015
March 2015
February 2015
January 2015
December 2014
November 2014
October 2014
September 2014
August 2014
July 2014
June 2014
May 2014
April 2014
March 2014
February 2014
January 2014
December 2013
November 2013
October 2013
August 2013
June 2013