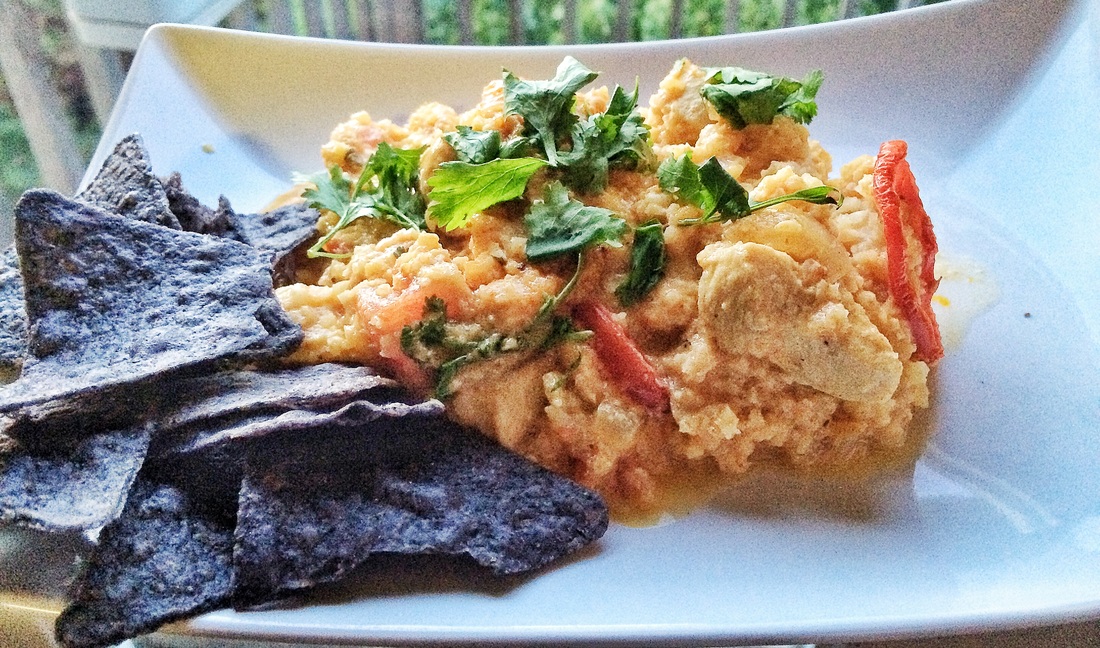
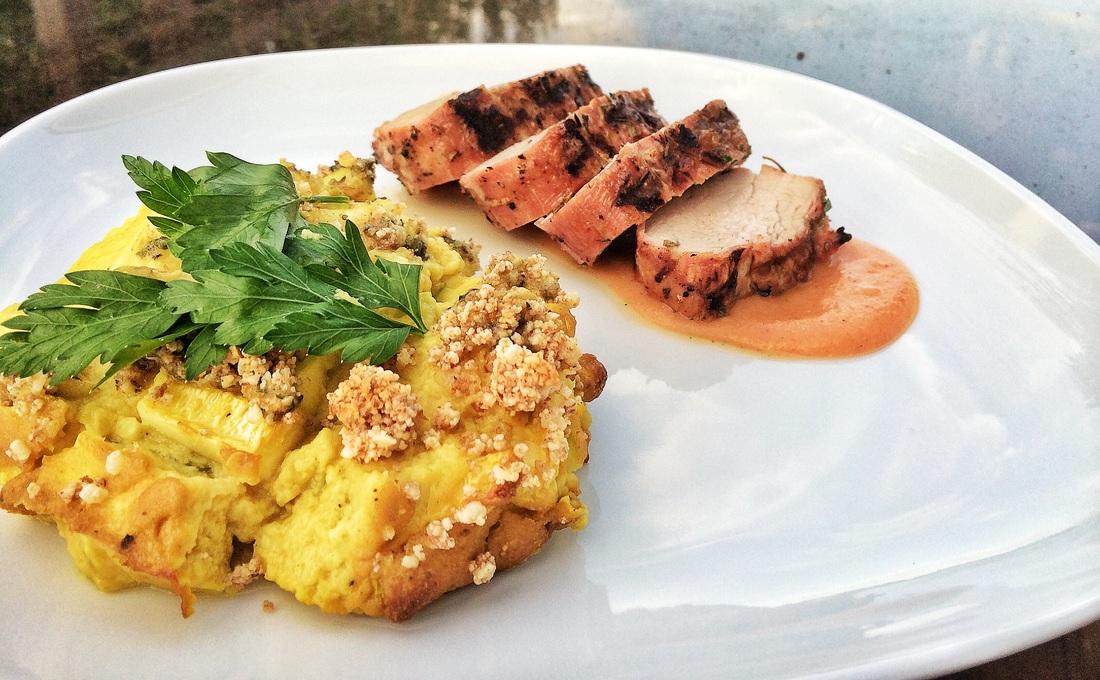
I have to apologize for the photo, I know it isn't the prettiest dish we have ever made but it was pretty darn tasty! Our sister-in-law asked us to HEALTHIFY a chicken and rice casserole...and she gave me a pretty blank slate, so I hope she likes this version! For those of you not from Minnesota or from a Scandavian descent, a casserole is usually made from noodles or rice, some sort of meat, cheese and usually cream of "something" soup. The veggies are typically hard to find and the processed food is usually a staple.
In an attempt to healthify the recipe, the swaps that we made was "riced" cauliflower and instead of creamy soup we used coconut milk. Then we loaded it up with some chicken breast and tomatoes. Although the cauliflower rice on it's own doesn't have the same taste as rice, when combined in a dish like this it takes on almost the exact same texture. Plus there is a enough flavor in a dish like this that you really do lose that cauliflower taste. 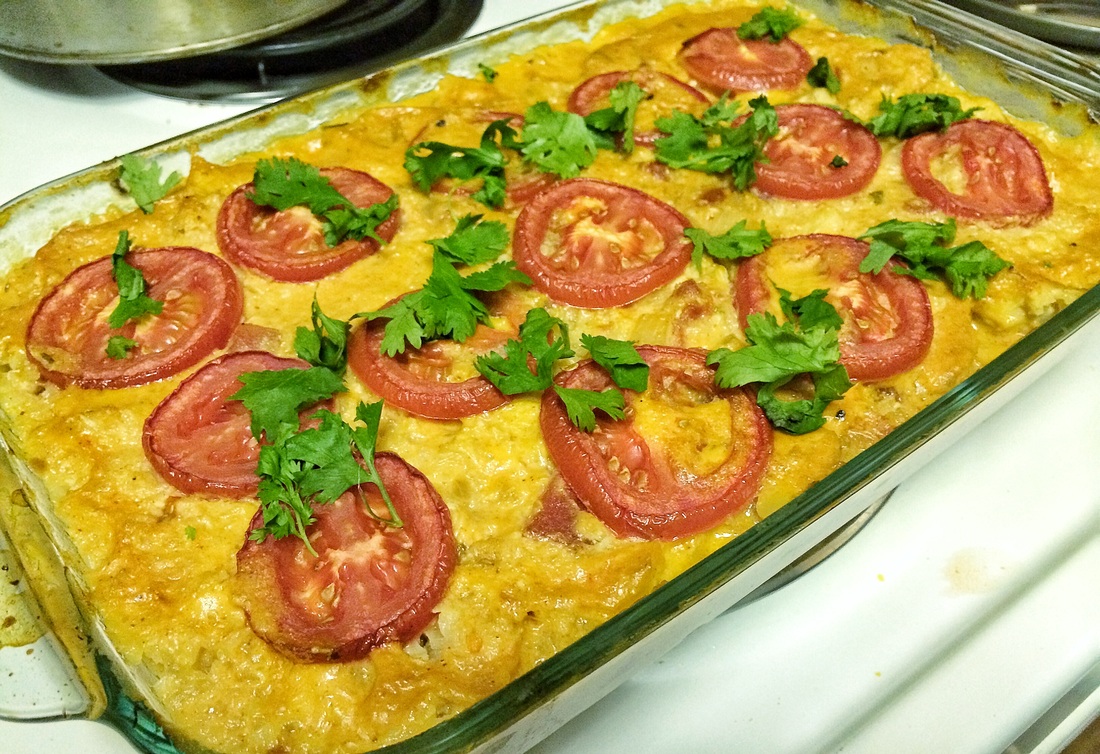
0 Comments

Here is a testimonial from one of our customers who saw AMAZING changes to her lifestyle with this program. We wanted to give you guys an idea of what this program is all about so you can see for yourself that it's not scary or difficult...plus if you purchase through us you'll get support and accountability to start and finish the program!
This testimonial is from our friend Nicole...over a 4 month period and a few rounds of the 21 Day Fix, she got some pretty awesome results....she went down 2 pant sizes and lost a total of 29 inches!! The best part is she learned how important proper nutrition really is: eating from all food groups and in the right quantity. Check out her answers below and let us know if you have any questions!! What did you think of the workouts? I loved them! I am currently doing the Piyo workouts and plan to move back to the 21 day fix program and workouts. I loved how they challenged me and I could physically see myself getting stronger (I even upped my weights towards the end). Were they challenging? Yes, I was just getting back into working out so they were a good workout for me. Did you find the modifiers helpful if you followed them? Yes, I always tried to do the workout without modification and then would switch to it when I needed. I still got a sweat on with doing the modifiers. 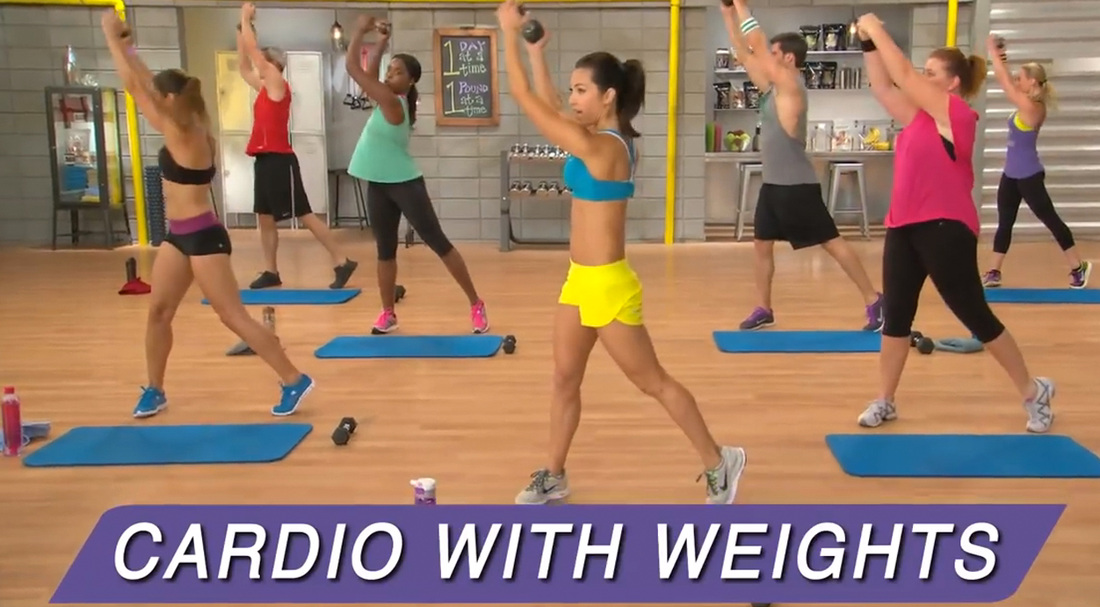
Did you feel like you got enough food using the containers?
Yes, there were some days when I thought "how am I am going to eat all this food?" It's definitely enough food to eat. Were you still able to enjoy meals out at restaurants? I did eat out a couple of times and was able to eat. I would keep my little book handy or if I knew which restaurant we were going to I would look up their menu and plan ahead what I would order. And NO, I didn't have to eat a salad every time I went out. I actually got to eat a burger (sans bun of course). Did the containers simplify your eating or your complicate your eating? A little of both. It was complicated in the beginning because prior to the plan, I never thought about what I was really eating. So that was more the education piece . But by the second week, I had all my meal plans ready and it became so much easier to pack my lunch. I knew what food went into what container. 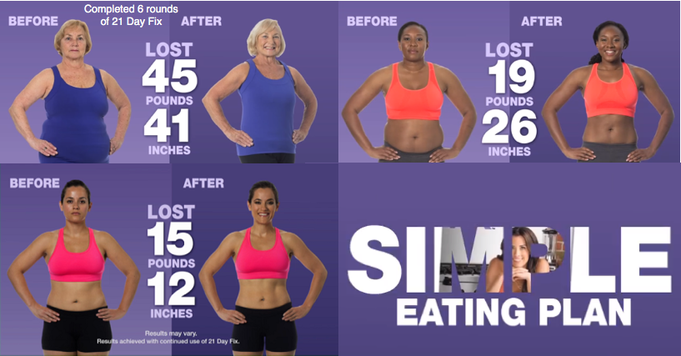
Did these workouts and eating plan easily fit into your busy day?
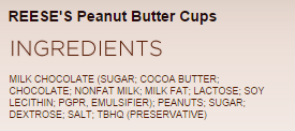
Yes, there is work in the beginning and it was a little tough...but by the second week it was super easy. I still use the containers to pack my food or make my dinner. I don't have to guess on my portion size, it's right there for me. In that aspect it made my day easier. I take out the greek yogurt and pour it into the container. I take out the chicken and put it into the container. Also, the workouts were 30 min. Even if I had to wait until my kids went to bed, it would be 9 PM and I would be done by 9:35PM . I mean its ONLY 30 MINUTES, how easy is that!? I will say this, there were also times when I just didn't want to workout. I was tired, I worked a full day, I took care of 2 kids , I cooked dinner for everyone, I put the kids to bed. A typical day is exhausting...BUT to my surprise when I started to eat healthier and exercise more, I was not as exhausted at 9 pm as I was when I didn't workout. That was a huge wake up call. YES, it did take some time to get there but I pushed myself through and I got there. How has this program changed the way you eat food after you finished it? With any real lifestyle change you are going to have to do things differently so that was the biggest hurdle. I wanted to start eating better and I really needed to work on my portion sizes so this is what I had to do to get there. I make a meal plan now, I ACTUALLY research the food I make and put into my body...and the biggest change was paying attention to my portion sizes. After doing the 21 day fix I realized my portions were OUT OF CONTROL! Once I finished with the 21 day fix, I didn't focus so much on the exercise. I knew I needed to fix my eating so that is what I focused on. I still used the containers to help and the book that is provided in the 21 day fix program has a list of food groups and recipes that I still use. The 21 day fix book is my kitchen "bible" : ) 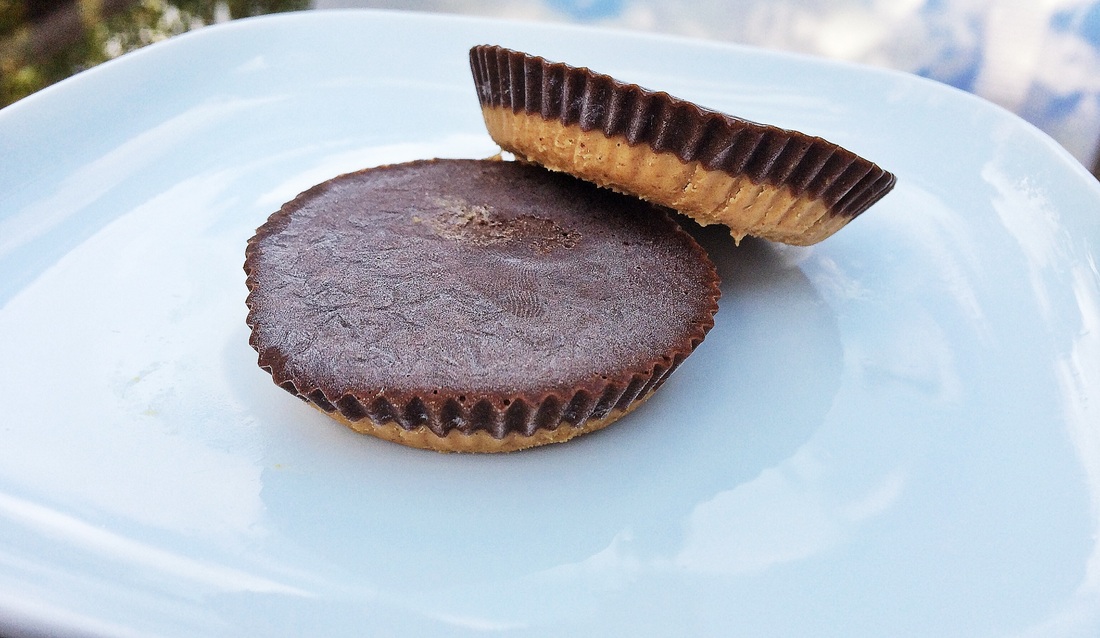 Who doesn't love the combo of peanut butter and chocolate. Reese's has made a fortune selling their delicious packaged goodness. How do they make them so good, SUGAR!!! Go figure a candy company puts a ton of sugar in their products, I guess I can't blame them. So we were asked to find a healthier version of this irresistible treat. This was a pretty simple task, we simple used a natural peanut butter and what better way to add some healthy chocolate flavor than use Chocolate Shakeology. As you can see by the nutrition facts, I think we did ok, less sugar and more protein, that's a win in my book.
Wednesday, August 13th, 2014....8:59 a.m. Our lives will never be the same again and we couldn't be happier about it. I have so many different thoughts, memories and reflections about that day...and the day before for that matter!! Contractions started around 3:00 am on Tuesday, August 12th. ALOT had happened leading up to that point mainly because Eli wanted to wait until he was good and ready...and 15 days past his "due date"! Because we were giving birth at a hospital we had to schedule an induction at the 2 week mark, but our midwives were pretty amazing and flexible and we were able to negotiate with them to wait just a little bit longer, so the actual induction was scheduled for Wednesday, August 13th. We were planning to try an herbal induction at 6:00 am on Tuesday and I really wasn't looking forward to drinking castor oil so I'm glad he decided to come on his own! We labored at home until about noon and the contractions were 3-4 minutes apart. At that point, I thought things would keep progressing but boy was I wrong! Contractions slowed and almost stopped on the 20 minute drive to the hospital and then we had to wait in the lobby for about 20 minutes because there were no triage rooms available. We got settled into the triage room so they could monitor me and check on progress. Our midwife, Anna, stopped in and after watching the monitor for a little bit and checking me...found that I was already at 6 cm. She told us that when she first saw me she was so close to just sending us home because she didn't really think I was in labor. Apparently I managed the pain well :) 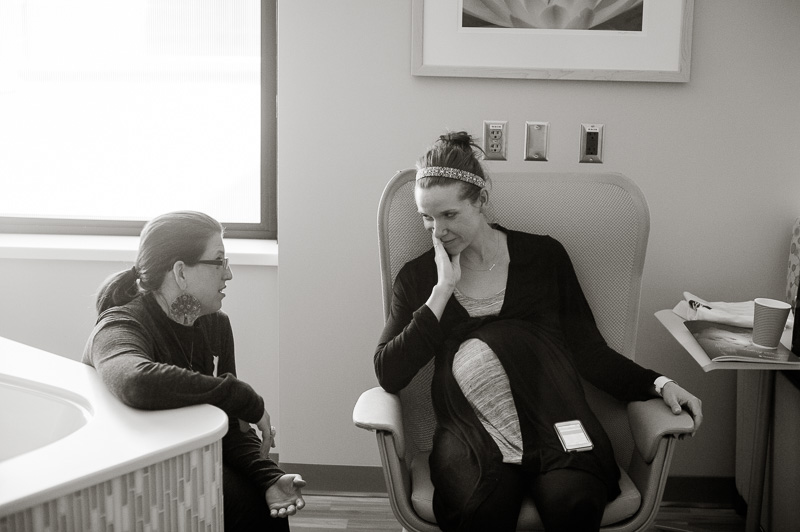 We finally got settled into our normal room and had steady contractions all afternoon/evening. I snacked on a few things but just like everyone said, I just wasn't hungry for anything....so I drank a lot of water and snacked on fruit from what I remember. Dan did go get dinner from the cafeteria and brought it up to the room. I remember smelling something REALLY nasty and found out he had gotten broccoli. Ugh. That was the one time I remember being a bit bitchy and just asked him to leave. Haha! I had really wanted to be able to move around with the contractions so we tried a lot of different things...including walking, using the labor ball, showering, getting into the tub (which btw was AMAZING except for the fact that the tub was so big and hard it was hard to find a good position for contractions), and having Dan help with a few positions etc....Around 11:00 pm our nurse and midwife came in for a chat to figure out what our next steps would be since my water still hadn't broken. My contractions were slowing a bit, so we decided to try to sleep for a few hours since I'd been up since about 3 am and then get back after it in the early morning . And just like that...an hour later my water broke while I was sleeping! Unfortunately there was a tiny bit of meconium in the fluid so that automatically meant I wouldn't get to do the water birth I had wanted...disappointing...but we definitely just tried to roll with it.  After my water broke, contractions did get a bit more intense and time seemed to just flow together. The birth center was SO busy that night so they were actually having to turn people away to two different hospitals, which meant our midwife had been in and out of our room maybe two or three times the entire night. Because of this, I was so so SO glad we had decided to get a doula...Julie Colby, from Lady's Slipper Wellness, was our doula and she was AMAZING. She provided so much support for both Dan and I...and was with us the entire labor. Our midwife did come in around 3 am (I think) and checked Eli's position. She realized then that he was sunny-side up....which would explain the horrible back labor I'd been having. We tried a few different techniques to get him to turn (which were very uncomfortable btw) and they didn't really work so we just went with it. Around 4 or 5 am I remember just not being able to keep my eyes open. I was so tired and really wasn't sure if I could do it!! Julie, my mom and Megan (our photographer) had just gotten back to the room from getting coffee and were a little hopped up on the caffeine :) so Julie went to talk to the midwife and they decided that NOW was the time to get moving. I guess I had thought my body would tell me when to start pushing but I had absolutely no idea what that "feeling" would be...so I had just been focusing on getting through all the contractions. 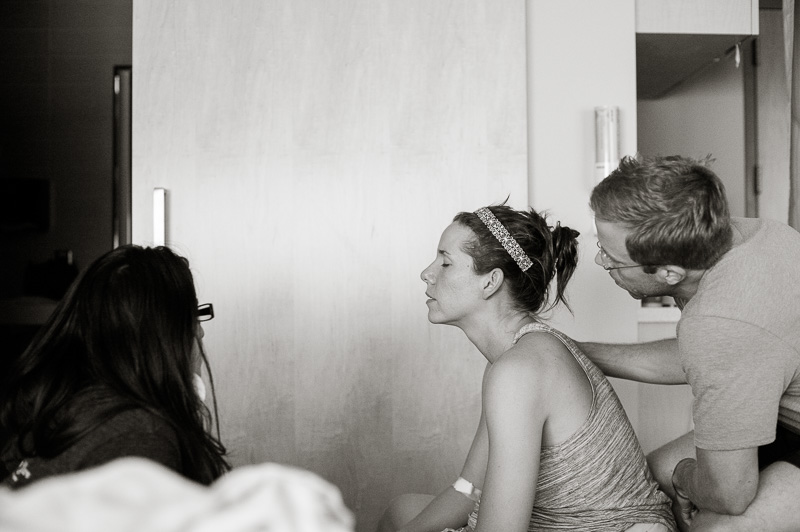 We started pushing on the toilet (yep..the toilet) to try and get a feel for what this pushing business was all about....but contractions decided to slow once again. At this point, 6:30 a.m., we had to do something to keep the contractions coming so we decided to start a small amount of pitocin to help with that. I remember not wanting to, but honestly at that point, we had to do something. The pitocin did change the contractions a bit and made them more intense so we started pushing again...this time on a birthing stool. I do remember at one point being SO annoyed that the contractions were so far apart because having to wait for the next contraction to push was NOT fun. I think pushing lasted for about 4-5 hours and Eli graced us with his presence (FINALLY) at 8:59 am!! Those last few pushes were pretty intense and I remember this amazing feeling of relief once he finally arrived! They did have to whisk him away for about 30 seconds to make sure he hadn't ingested some of the meconium but he was back in my arms so fast and everything was fine!! I'll spare you all the details after this point, but I do remember being STARVING almost immediately and could not wait to eat!! I think I ordered pancakes and eggs :) I also remember the warm blankets being absolutely incredible...I'm pretty sure I had about 3 of them on me at one point. Ha!
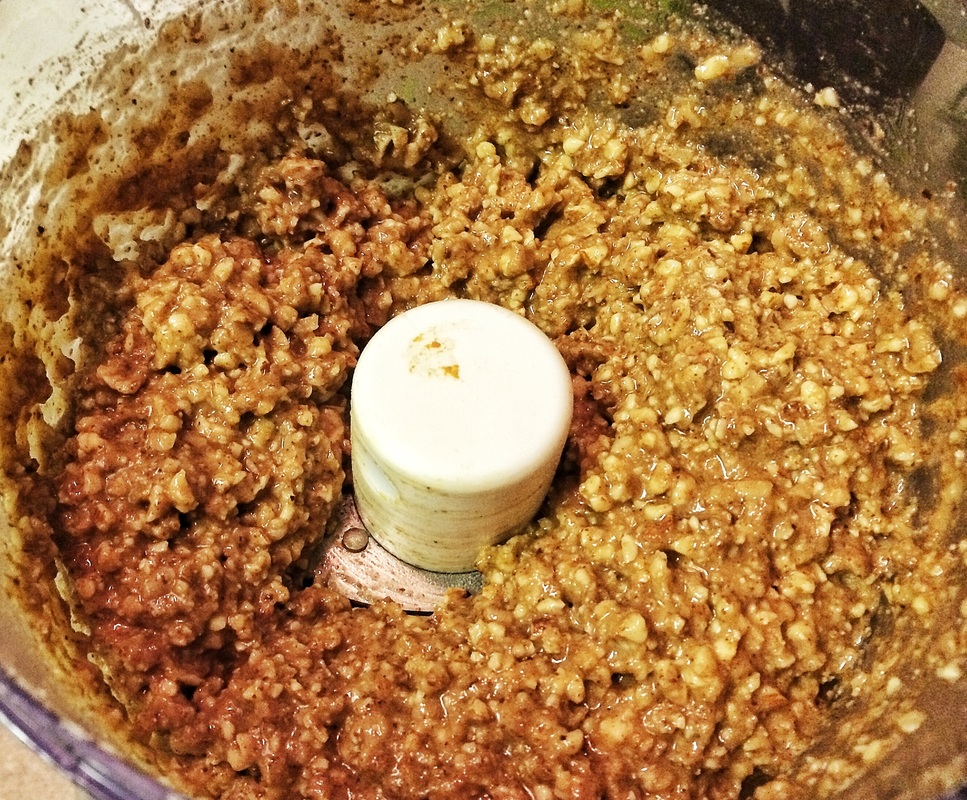
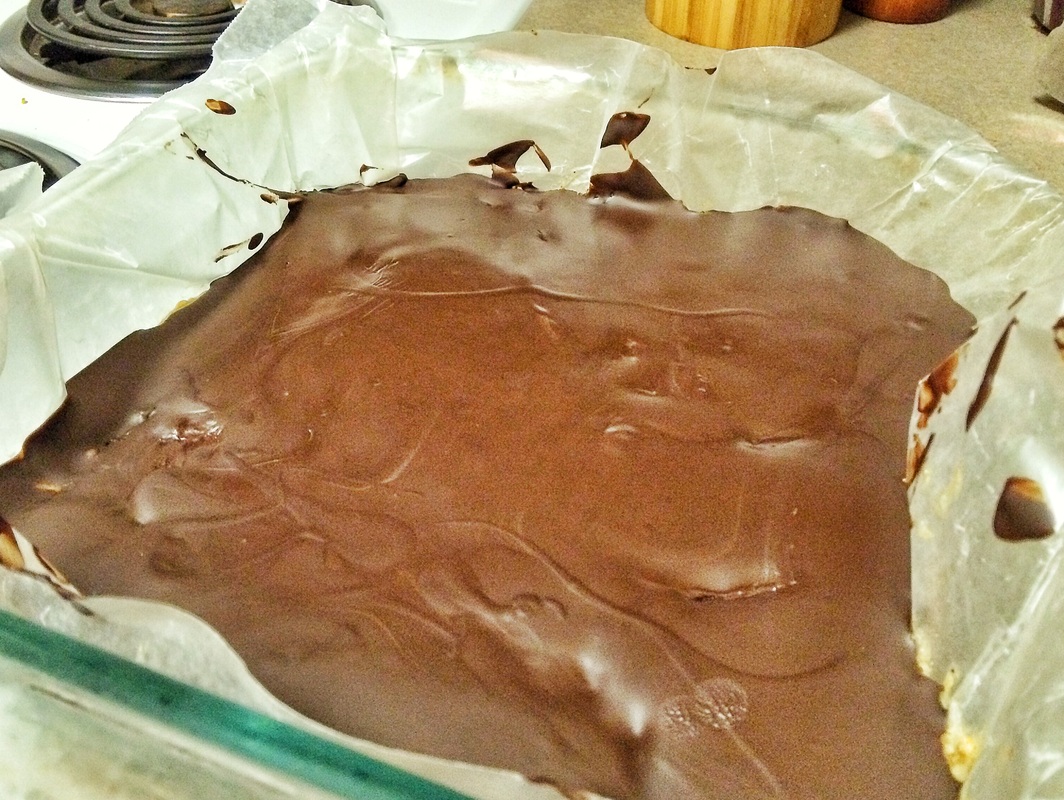
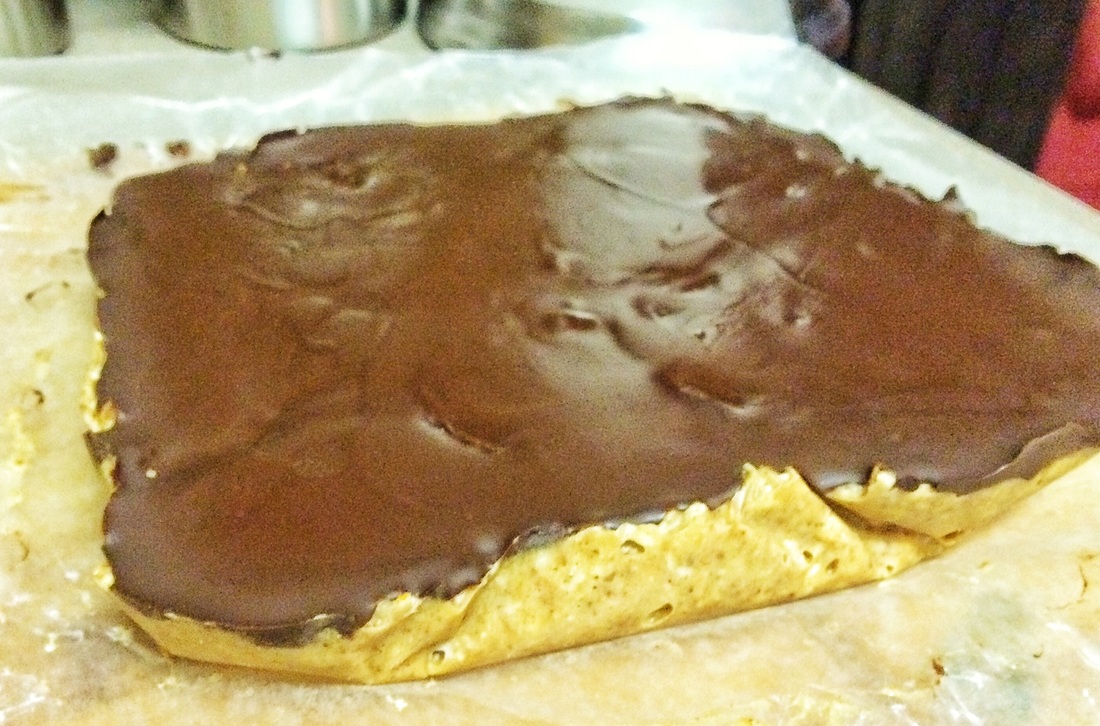
We spent the morning just staring at Eli's sweet face and letting the nana/papa (my parents) and grandma/grandpa (Dan's parents) meet the little guy! I honestly can't say enough about the support team I had...They were all there pretty much the entire 22 hours of labor at the hospital: Dan, Julie, my mom and Megan. Dan was an AMAZING support the entire time and I know I couldn't have done it without him!! Julie supported both Dan and I and was such a blessing before the birth, during the birth and even after! I remember looking up multiple times to see my mama there and just praying...that in and of itself was incredible. And Megan had 3 other births that same night...but she somehow juggled those and then came back in the middle of the night to be with us!  I know doing an all-natural birth is not for everyone...but I don't regret doing it at all...Yes, it was TOUGH. The hardest thing I've ever done. Would I want to do it again tomorrow? Hell no :) but that's mainly because it was so long! Being able to actually feel everything was kinda incredible. The human body is crazy amazing and the way it all just works together makes me even more in awe of this God we serve!! Eli is now 4 weeks old TODAY...Happy Birthday buddy! We cannot imagine life without his sweet face....right now he grunts a lot but there is a fleeting smile and he's starting to kind of "talk" to us which is really fun. He's starting to get a few more rolls in his arms and legs and can find his thumb every once in a while. He loves to be in the Boba and dad has gotten really good at putting him to sleep in the fleece sling. We can't wait for all the other new things he's going to be experiencing over the next few months!!  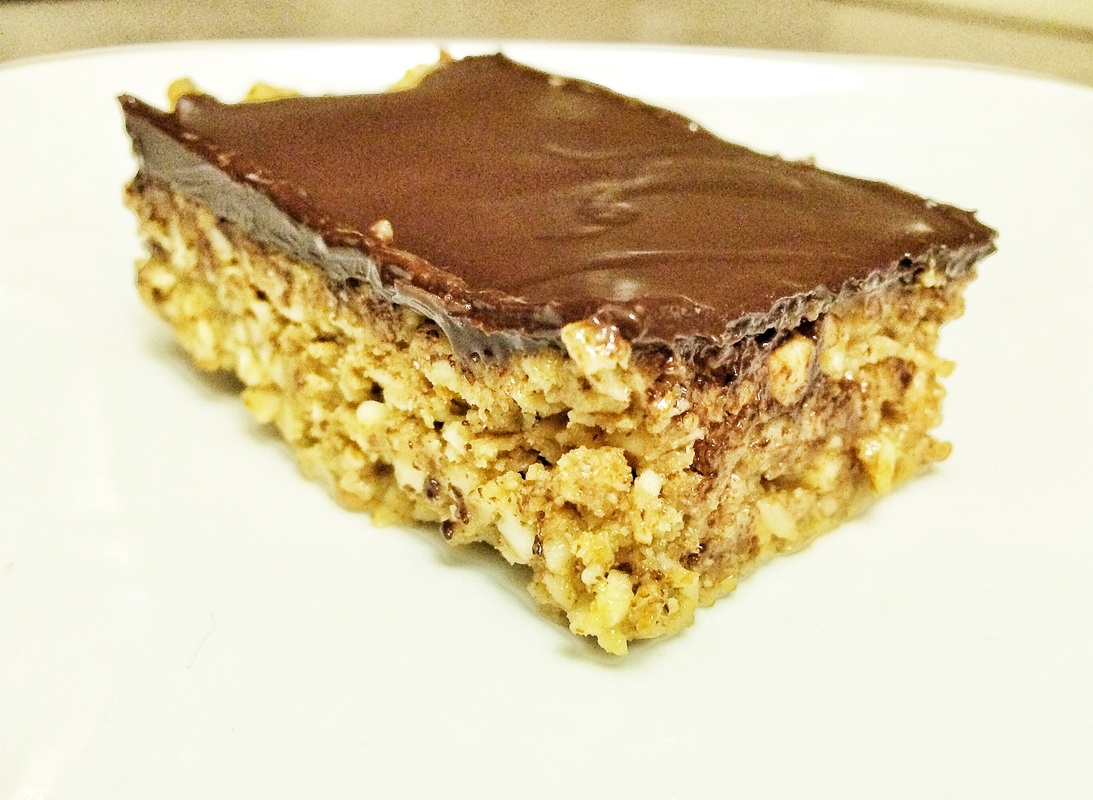 The original version of this bar is one of my all time favorites. How can you go wrong with chocolate, peanut butter, crispy Special K cereal, and tons of sugar? Given our new found healthy living lifestyle eating bars like that isn't a frequent occurrence. That doesn't necessarily mean I will never eat the original version again, but try to make it a very infrequent indulgence. Not to say the Paleo version is necessarily healthy, but there isn't the guilt of eating a bunch of processed food and sugar. So ever since the 4th of July where a friend of ours made the original version, I had the idea of wanting to try to find a healthier option. I will be the first one to admit that I'm not a baker and have never been one to make desserts. With cooking I don't mind experimenting and just throwing things together. With stuff like this though I have no idea how to balance flavors so I had to do a little research, so this recipe was found on The Paleo Mom's website. The ingredients listed below is a slight modification from hers, due to the bars being a little bit on the gooey side and a little bit on the sweet side. I think that could have been because we used a Justin's Maple Almond Butter, it was all we had in the house. So if you can try to find a plain almond butter to cut a little bit of that sweet, unless you really like sweet desserts.
 So we asked you guys via our Facebook Page what were some of your guilty indulgences. For most humans at some point in our lives we have all had certain foods that we ate because they just taste so damn good even though we know they are unhealthy. Mac and cheese definitely falls into that category. There are two kinds of mac and cheese in my mind, the first being the kind that came out of the blue box with powdered cheese. I'm pretty sure that cheese sauce had crack in it because it tasted so good, especially the spirals....but seriously, this is about one of the most processed foods you will find on a store shelf. Frankly, looking back I don't even know if I would call it food. The second version is the homemade version which is loaded with butter, cream, and cheese, not to mention the vehicle to consume said fat mixture is an enriched white flour noodle. Just in case that wasn't enough fat, I would usually throw some bacon into my version too. So the feat of "healthifying" this dish was going to be a tough one. I knew that I wasn't going to try to make a powder that somehow magically turned into cheese. So the other option was to try to recreate the base bechamel sauce that traditional mac and cheese is made from. Your traditional bechamel is made from fat and flour and it usually incorporates onion. In the case of mac and cheese, you also add cheese to it. I had heard of someone else making a cream sauce out of cauliflower before so I figured this would be the perfect time to try that out. I've done a cauliflower puree before, so this was simply making that a little thinner to resemble a bechamel sauce instead of mashed potatoes. So I've now got a creamy sauce but then I had to somehow infuse that sauce with a cheese flavor. Let me just start by saying actually cheese flavor is next to impossible to recreate but I feel this got close. So a lot of cheeses have a nutty taste to them along with a an obvious saltiness. Salt is the easy part, so for the nutty factor I used cashews that I had soaked in water for about 4 hours to soften them. Another ingredient that our friend Lindsay over at The Paleo Paramedic told me about was Nutritional Yeast. Nutritional yeast has a natural cheese like flavor. It is also a great source for your essential B vitamins, which if you live in the vegetarian or vegan world can be the toughest vitamins to acquire through food sources. So I added all of that to get it tasting like a cheese sauce...but that last elusive thing was giving it that cheese color. Tumeric to the rescue. Not only is tumeric a superfood but is also turns anything it touches yellow. So we've got a blob of cheesey like goodness which is actually really healthy for you but do you just drench regular noodles or at best whole wheat noodles in this sauce and call it a day? You certainly could and you would have a tasty dish...so if you want to stop right there, feel free. But to ultra-healthify this dish, why not find another vegetable that would resemble elbow macaroni. My brain ran the gamut of veggies trying to think of something that would resemble the texture and size of elbow macaroni. If you are following us or in the healthy eating community you have probably heard of Zoodles or noodles made out of zucchini. Typically, most people use a spiralizer or mandolin to cut zucchini into either a spaghetti or egg noodle like shape. I wasn't able to get that little curve in the noodle or make them hollow by just using a knife, but I cut zucchini into a 1/4" x 1/4" by 1" pieces so that it would resemble macaroni.  What would some homestyle mac and cheese be without a topping, right??? So to add that crunch to the top of this dish I just added some crushed almonds that I combined with some dried parsley and oregano.  Some possible modifications if you aren't looking for an ultra healthified mac and cheese option or you don't need to follow a vegan diet.
|

The Cook & The CoachHealthy is a LIFESTYLE. 
Categories
All
Archives
November 2019
|


 RSS Feed
About Us
|
Contact UsAffiliate Disclosure
|